Forensic photography is the systematic visual documentation of a scene, object, injury or trace so that another person can understand what was observed, where it was found and how it relates to its surroundings. A reliable photographic record is not simply a collection of attractive pictures. It must establish context, record relevant details, protect the integrity of originals and make the limitations of each image clear.
- Overall, Mid-Range and Close-Up Photography: What Is the Difference?
- 1. Overall Photography: Establishing the Scene
- 2. Mid-Range Photography: Connecting Evidence to Its Position
- 3. Close-Up Photography: Recording Detail
- 4. A Practical Crime Scene Photography Workflow
- 5. Camera Settings, Lighting and Measurement Considerations
- 6. Digital Image Integrity, Authenticity and Courtroom Use
- 7. Three Hypothetical Field Scenarios
- 8. Common Errors and Their Controls
- 9. Field Completion Checklist
- 10. Historical Context: From Identification Portraits to Modern Digital Records
- Frequently Asked Questions
- Continue Learning on Simply Forensic
- References and Authoritative Technical Sources
This guide explains the three foundational viewpoints—overall, mid-range and close-up photography—and shows how to combine them into an auditable crime scene record. It also covers scales, camera technique, digital preservation, scene-specific examples, common mistakes and reporting limitations. It is written for students, scene investigators and practitioners who need an evidence-led explanation rather than a rigid camera-setting recipe.
Essential principle:
The series should answer three distinct questions: Where is the scene? Where is the evidence within that scene? and What does the evidence actually look like? No single photograph usually answers all three.
- The three photograph types
- Overall photography
- Mid-range photography
- Close-up photography
- Field workflow
- Technical considerations
- Image integrity
- Worked scenarios
- Mistakes and controls
- FAQs
- References
Overall, Mid-Range and Close-Up Photography: What Is the Difference?
The National Institute of Justice’s Crime Scene Investigation: A Guide for Law Enforcement describes a systematic sequence of overall, mid-range and close-up photographs. Their purpose is complementary: viewers need both the broader environment and sufficient detail to evaluate an item without guessing about its location.[1] Viewpoint, sequence and coverage must still be adapted to the scene; this is a planning framework, not an instruction to ignore transient evidence while completing an entire building-wide series.
| Photograph | Primary question | Typical composition | Main limitation |
|---|---|---|---|
| Overall | Where is the scene? | Environment, approaches, entrances, room or scene layout | Small evidence may be invisible |
| Mid-range | Where is the item relative to landmarks? | Item plus fixed features or nearby objects | Can distort apparent relative size or distance |
| Close-up | What features or condition does the item show? | EvidenceEvidence is any form of proof, such as objects, materials, or scientific findings, presented to establish or disprove a fact in a legal proceeding. It Read Full Definition fills a substantial part of frame; scale where appropriate | Loses scene context unless paired with wider images |

1. Overall Photography: Establishing the Scene
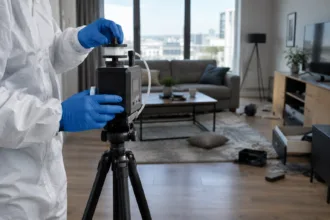
Overall photographs establish the location and condition of the scene before investigative changes. Exterior images may show building numbers, adjacent streets, access routes, windows, entry and exit points, and relevant surroundings. Interior overviews show the layout of rooms, fixed architectural features, doors, furniture and large objects. They help a reviewer orient later, more detailed images to a recognizable space.
Begin with reasonable wide views from safe access points, then work systematically through the area. Multiple vantage points help show parts of a scene that one view would obscure. Where useful, use overlapping images of adjacent areas, maintaining enough shared landmarks that viewers can follow the progression. Record conditions such as lighting, open doors or windows, weather-exposed surfaces and any visible alteration caused by emergency response.
Wide-angle lenses can be helpful in confined rooms, but they can exaggerate perspective near the frame edges or create lens distortion. An apparently large gap near the camera is not a reliable dimensional measurement without appropriate geometry and reference information. Photographs are also not a substitute for measured sketches or validated 3D survey methods.
Overall photograph example
At a suspected burglary, the overall sequence might show the street-facing entrance, hallway, room layout, broken window and the relative positions of doors and furnishings. The goal is not to prove how entry occurred. It is to preserve the scene as observed so that entry hypotheses can be considered alongside examination findings, witness accounts and other records.
2. Mid-Range Photography: Connecting Evidence to Its Position
Mid-range photographs are the bridge between a broad overview and a detailed close-up. They should show an evidence item and one or more stable reference points—such as the edge of a table, doorway, fixed cabinet, pavement marking or adjacent object. Without a recognizable reference, an isolated close-up of a key, cartridge case or glass fragment may not show where it was recovered.
Take enough images from suitable viewpoints to communicate the spatial relationship clearly. Whenever practicable, avoid compositions that make distant items appear to be the same distance from the camera. Perspective makes nearby objects appear larger; apparent proximity in a photograph does not prove physical contact. A photograph can document a relationship visually but should not be used alone to assert exact distances.
Capture an unaltered mid-range view before adding evidence identifiers or rulers. Additional views with markers can help communication, provided the markers do not hide important features. The photographs and notes should establish when any placards were added and whether the placement required movement or contact with surrounding material.[1]
Mid-range photograph example
A keyring on a living-room floor is photographed together with the adjacent chair leg, side table and doorway. A later close-up shows its detailed appearance. The two views allow the reader to connect the detailed object with the broader scene, rather than inferring its original position from the close-up alone.
3. Close-Up Photography: Recording Detail
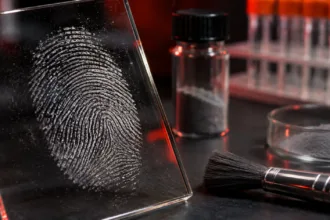
Close-up photographs record physical characteristics that cannot be resolved in wider views: surface marks, damage, fracture edges, writing, injury morphology, impressions or small trace material. For an item with visible pattern detail, the subject should occupy enough of the image to show that detail sharply. Depth of field, lens capability, illumination and camera stability determine whether it is actually usable.
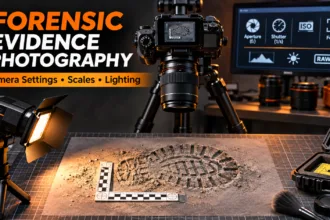
When dimensions, shape or later comparison may matter, capture a sharp photograph without a scale first, followed by an appropriately scaled image. Placing a ruler or label changes the photographed scene and may obscure or touch the item, so an unscaled original-context image remains important. A forensic scale should be placed as close as feasible to the item’s plane, without contacting or disturbing vulnerable evidence, and the camera’s imaging plane should be approximately parallel to the item plane for measurement-focused photographs.
A scale next to an uneven three-dimensional object is not necessarily in the same plane as every part of that object. Perspective, lens distortion, depth differences and ruler accuracy can all compromise dimensional interpretation. NIST researchers identified manufacturing variability among commercially available forensic scales; even a familiar L-shaped scale should not be assumed to provide perfect accuracy without appropriate quality controls.[2]
For footwear impressions, toolmarks and textured surfaces, consider perpendicular and oblique views as distinct records. A near-perpendicular view with a correctly positioned scale supports examination of shape and dimensions; angled or side lighting can make shallow relief more visible. For injuries or biological traces, choose methods that reveal the relevant features while avoiding unnecessary disturbance and following applicable dignity, privacy and evidential requirements.
Important distinction:
A close-up photograph showing a pattern is not automatically a measurement-quality comparison image. Comparison examinations may demand controlled illumination, camera geometry, resolution and other discipline-specific conditions.
[3]4. A Practical Crime Scene Photography Workflow
- Confirm authority and safety. Obtain the required investigative authorization, follow scene access and protective procedures, and choose a route that does not compromise fragile evidence. Coordinate with the scene manager and other examiners.
- Make a preliminary visual assessment. Identify overall boundaries, likely access points, fixed landmarks, fragile or transient evidence, hazardous conditions and areas requiring specialist techniques. Record any pre-existing changes made by emergency personnel.
- Record photography setup. Note photographer identity, case identifier, approximate time, camera identity where required, relevant lenses or filters, and whether camera clock settings were verified. Do not rely on a device’s date and time being correct without checking.
- Prioritize transient conditions. Rain-exposed impressions, moving objects, changing illumination and other vulnerable observations may require immediate photography, even if the normal overall-to-close-up sequence must be adapted. Document why.
- Capture overall views. Show the location and layout from multiple suitable viewpoints, with enough common features to orient later photographs. Avoid moving objects for a clearer picture unless an authorized, documented examination requires it.
- Capture mid-range context. Link each significant item with recognizable reference objects. Photograph important spatial relationships from more than one viewpoint where needed.
- Capture close-ups before interventions. Photograph the evidence as found; then add a suitable scale or label when needed, recording the change. For measurement-focused photographs, check focus, perspective and scale placement.
- Record changes and additional examinations. Take further images after relevant controlled movement, lifting, enhancement, collection or removal. Keep the photographic chronology clear rather than mixing pre- and post-intervention images without labels.
- Preserve originals and reconcile the image log. Transfer using an approved procedure, verify that files are complete, retain unaltered originals, create working copies for processing and record any later adjustments. Retention, transfer and disposal follow the responsible agency’s established policy.
This framework is consistent with the general intent of the NIJ guide and SWGDE’s integrity guidance, but it does not replace local standard operating procedures or the judgment of trained scene personnel.[1], [4]
5. Camera Settings, Lighting and Measurement Considerations
Good forensic photography depends on the intended use of the image. A photograph that is adequate for orientation may be inadequate for a fine toolmark or small fingerprint ridge detail. Set exposure and focus to preserve the relevant information, check the result at useful magnification and retake deficient images where the scene remains available.
| Control | What it affects | Practical implication |
|---|---|---|
| Aperture | Exposure and depth of field | Choose sufficient depth of field for the required surface detail; very small apertures can reduce sharpness through diffraction. |
| Shutter speed | Motion blur and exposure | Use stable support and an appropriate shutter time when small details or low light make shake likely. |
| ISO setting | Exposure-index/sensitivity setting and noise characteristics | Avoid unnecessary image noise; there is no universal ISO value for all scenes. |
| Focus and magnification | Resolvable detail | Review the actual evidence area, not just the overall appearance on a small camera screen. |
| White balance | Rendered color | Record or control lighting conditions when color may be evidentially relevant. |
| Flash and supplemental light | Contrast, shadow and reflection | Take alternative illuminated views where necessary; oblique illumination may reveal shallow detail. |
In photography, an ISO setting is a standardized camera sensitivity/exposure-index setting, not an abbreviation that should be expanded as the name of the international standards body. Higher settings can make low-light capture practical but may introduce more noise or processing artifacts. Camera choice and imaging workflow should be justified by the evidence task rather than a single megapixel minimum.
Special lighting. Oblique light can accentuate impressions and toolmarks through shadow. Cross-polarized light can reduce some reflections. Alternate light sources and viewing filters may improve visibility of selected materials, but illumination does not independently identify a substance. Capture a suitable conventional-light reference, record the optical setup and avoid representing a fluorescent response as a confirmatory identification.
Image formats. RAW may retain minimally processed sensor data and greater adjustment latitude; JPEG may provide efficient, widely readable files but typically uses lossy compression. The appropriate format depends on equipment, agency policy and intended evidential use. Neither a RAW file nor a large JPEG proves that the scene was accurately represented.
A dedicated companion tutorial will treat exposure, flash positioning, scales, focal length, focus stacking and measurement-quality imaging in greater technical depth. See also the crime scene documentation guide and crime scene investigation overview.
6. Digital Image Integrity, Authenticity and Courtroom Use
The evidentiary value of a photograph depends on its provenance, documented acquisition and whether the image fairly represents the relevant observations. Integrity concerns whether the retained image data have remained complete and unaltered since a documented point in the workflow; authenticationVerifying the identity of a user, process, or device, often as a prerequisite to allowing access to resources in an information system. Read Full Definition concerns whether a photograph is what it is represented to be. They are related but different questions. SWGDE recommends protecting originals, restricting access, documenting processes and using suitable verification methods.[4]
Digital photographs can be copied exactly, and cryptographic hashes can help establish whether a file has changed since a recorded baseline. A matching hash does not establish when or where a photograph was taken, whether it depicts an unaltered scene, or whether its description is accurate. EXIF metadata can aid documentation but can also be missing, inaccurate or modified. Camera time, capture conditions, transfers and custody still require independent recording.
Photographic adjustments should be carried out on working copies, not by overwriting the retained originals. Processing such as exposure adjustment, color correction, cropping or sharpening can change how features appear and must be documented in proportion to its use and potential evidential effect. A derivative must not misrepresent, conceal, insert or invent relevant visual content. AI-generated or generatively reconstructed imagery is an illustration or analytic product, not a substitute for a captured evidentiary image. SWGDE’s image-processing guidance addresses traceability and the need to document processing steps.[5]
A photographic record also has limits. Camera position may alter apparent distances, exposure can conceal detail and a single frozen image cannot establish how or when an object reached a location. A picture of a broken window does not, by itself, establish the direction of breakage or identity of the person responsible. Interpretation must be tested against other evidence and plausible competing explanations.
Do not confuse an image’s acceptability for display with its fitness for expert comparison. Different procedures apply to general scene documentation, controlled laboratory photography and disciplines requiring measurement or pattern comparison.[3], [6]
What should the photograph log record?
A proportionate log should link an image or sequence to its case identifier, photographer, date/time with clock accuracy noted when relevant, scene location, subject, viewpoint, scale/placard use, unusual lighting, significant changes to the scene and image transfers. Depending on the agency, lens/filter information and digital integrity records can be maintained in image metadata, a scene log or a separate imaging record. The aim is a coherent, reviewable trail rather than unnecessary repeated transcription.
7. Three Hypothetical Field Scenarios
These are invented teaching scenarios. They describe documentation choices and do not present actual case findings.
Scenario A: Keyring near a chair
Overall: photograph the room from its entrance and opposite corner, showing the chair, table, doorway and floor. Mid-range: frame the keyring together with the chair leg and table, providing stable location context. Close-up: photograph the keyring as found, then with an appropriately positioned scale if dimensional detail is needed. Interpretive limit: none of the photographs proves when the keyring arrived or who handled it.
Scenario B: Footwear impression exposed to rain
Priority: document the vulnerable impression immediately before rainfall damages it, even if the whole-site overall series is incomplete. Overall: include the path, approach and adjacent landmarks. Mid-range: locate the impression relative to fixed path features. Close-up: record an unscaled perpendicular view and an examination-oriented scaled view, with supplemental oblique illumination if useful. Interpretive limit: an image alone cannot reliably determine the person’s identity or the exact time of deposition.
Scenario C: Damaged doorway with multiple trace types
Overall: document both sides of the doorway and room connections. Mid-range: show splintered wood and nearby displaced fragments relative to the door frame and floor. Close-up: record damage detail and individual fragments, avoiding movement before their original positions are documented. Interpretive limit: apparent damage direction or tool type should not be concluded from a single oblique photograph without an appropriate reconstruction or comparison examination.
8. Common Errors and Their Controls
| Problem | Why it matters | Control |
|---|---|---|
| Only close-ups taken | Location and relationships lost | Pair with overall and mid-range images |
| Evidence photographed only after placing markers | Original condition obscured | Record before intervention and after as needed |
| Scale in wrong plane or tilted camera | Apparent dimensions distorted | Check geometry and qualified scale |
| Blurred, clipped or poorly exposed key detail | Information may be unrecoverable | Review sharpness and exposure on-site |
| Untracked image edits | Integrity and reproducibility concerns | Retain original, log processing and verify versions |
| Treating a picture as proof of an event sequence | Overstates evidential support | Separate observation from competing explanations |
9. Field Completion Checklist
- Scene access, hazards and transient evidence considered.
- Overall views establish location, layout and orientation.
- Mid-range views connect each important item to identifiable landmarks.
- Close-ups capture relevant detail before scales, markers or movement.
- Scaled images use suitable geometry and do not disturb vulnerable evidence.
- Relevant changes, specialist lighting and photographic limitations recorded.
- Image files reviewed for completeness, sharpness and suitable exposure.
- Originals retained securely; image processing and transfers documented.
- Photographs, scene notes and item identifiers are mutually consistent.
10. Historical Context: From Identification Portraits to Modern Digital Records
Alphonse Bertillon helped promote systematic photographic practices in criminal identification during the nineteenth century. His standardized identification portraits are historically important, although identification photography should not be confused with the separate task of documenting the location and condition of physical evidence at a scene. Contemporary practice adds controlled acquisition, metadata, digital preservation, validation and method-specific reporting to this longer photographic history.

Frequently Asked Questions
Frequently Asked Questions
What is the difference between overall, mid-range and close-up photographs?
Overall images establish the scene and surroundings. Mid-range images link specific evidence to nearby landmarks. Close-ups document fine details of an item. Together they preserve context and visible characteristics more effectively than any one view alone.
Should crime scene evidence be photographed before placing a scale?
Generally yes. Record an item in its original condition before adding placards or rulers. When a scale is appropriate, take an additional photograph that places it near the subject and, for measurement-oriented images, in the relevant plane without disturbing evidence.
Are photographs with a ruler automatically accurate measurements?
No. Perspective, scale placement, camera geometry, lens distortion, surface relief and the accuracy of the ruler all matter. Photographs intended for dimensional comparison require greater technical control than photographs intended solely to illustrate a scene.
Is RAW always required for forensic photography?
Not universally. RAW provides minimally processed image data and may be beneficial for certain workflows, but capture formats must be compatible with validated equipment, the intended examination and agency policies. Regardless of format, preserve unaltered originals and record derivatives.
Does a matching file hash prove a photograph is authentic?
A matching hash supports the conclusion that the same file data were retained between two documented points. It does not independently prove the photograph's source, correct timestamp or faithful representation of the scene.
Can forensic photographs be edited?
Documented image processing on working copies can be appropriate for a defined forensic purpose. Originals should remain intact. The processing should be reproducible, should not introduce or conceal evidential details and should be disclosed as required by the method and legal setting.
Can photographs alone reconstruct what happened at a crime scene?
Photographs preserve selected views at specific times. They can support reconstruction, but usually cannot independently determine timing, motive, identity or the full sequence of events. Conclusions need other observations, testing and competing-hypothesis evaluation.
Continue Learning on Simply Forensic
- Crime Scene Investigation: A Comprehensive Guide — the overall evidence-processing framework.
- Crime Scene Documentation Mastery — integrating photography, notes, video and sketches.
- Footwear Impression Evidence — why scale, perspective and impression context matter.
- Forensic Method Validation — competence, method limitations and reliable conclusions.
- Forensic Error Rates — interpreting method performance and uncertainty.
References and Authoritative Technical Sources
The following links are primary technical guidance and research rather than generic photography tutorials. Document status matters: proposed guidance is identified as proposed and is not represented as a published mandatory standard. Accessed 15 November 2026.
References & Sources
Show referencesHide references
- National Institute of Justice. (2013). Crime Scene Investigation: A Guide for Law Enforcement . NCJ 243598. Official publication record . Guidance on documenting the scene, photographing transient evidence and overall/mid-range/close-up photography. Source
- Ferrucci, M., Doiron, T. D., Thompson, R. M., Jones, J., Freeman, A. J. and Neiman, J. A. (2015). Dimensional review of scales for forensic photography. Journal of Forensic Sciences . DOI ; NIST publication record . Source
- Scientific Working Group on Digital Evidence (SWGDE). Best Practices for Photographic Comparison for All Disciplines , 15-I-002. Published guidance . Source
- SWGDE. Best Practices for Maintaining the Integrity of Imagery , 17-I-001-1.1. Published guidance . Source
- SWGDE. Image Processing Guidelines , 15-M-002. Published guidance . Source
- SWGDE. Guidelines for Evidence Photography in a Controlled Setting , 18-P-001-2.0. Published guidance . Source
- NIST OSAC, Video/Imaging Technology & Analysis Subcommittee. (June 2020). Standard Guide for Crime Scene Photography , Version 1.0. OSAC proposed standard, not an SDO-published standard . Proposed guide (PDF) . Source
Educational article. Scene documentation, legal authorization, image handling and courtroom procedures vary by jurisdiction and organization. Follow current agency SOPs, applicable standards and competent professional supervision. Original three-view educational illustration generated for Simply Forensic; not an evidentiary photograph.