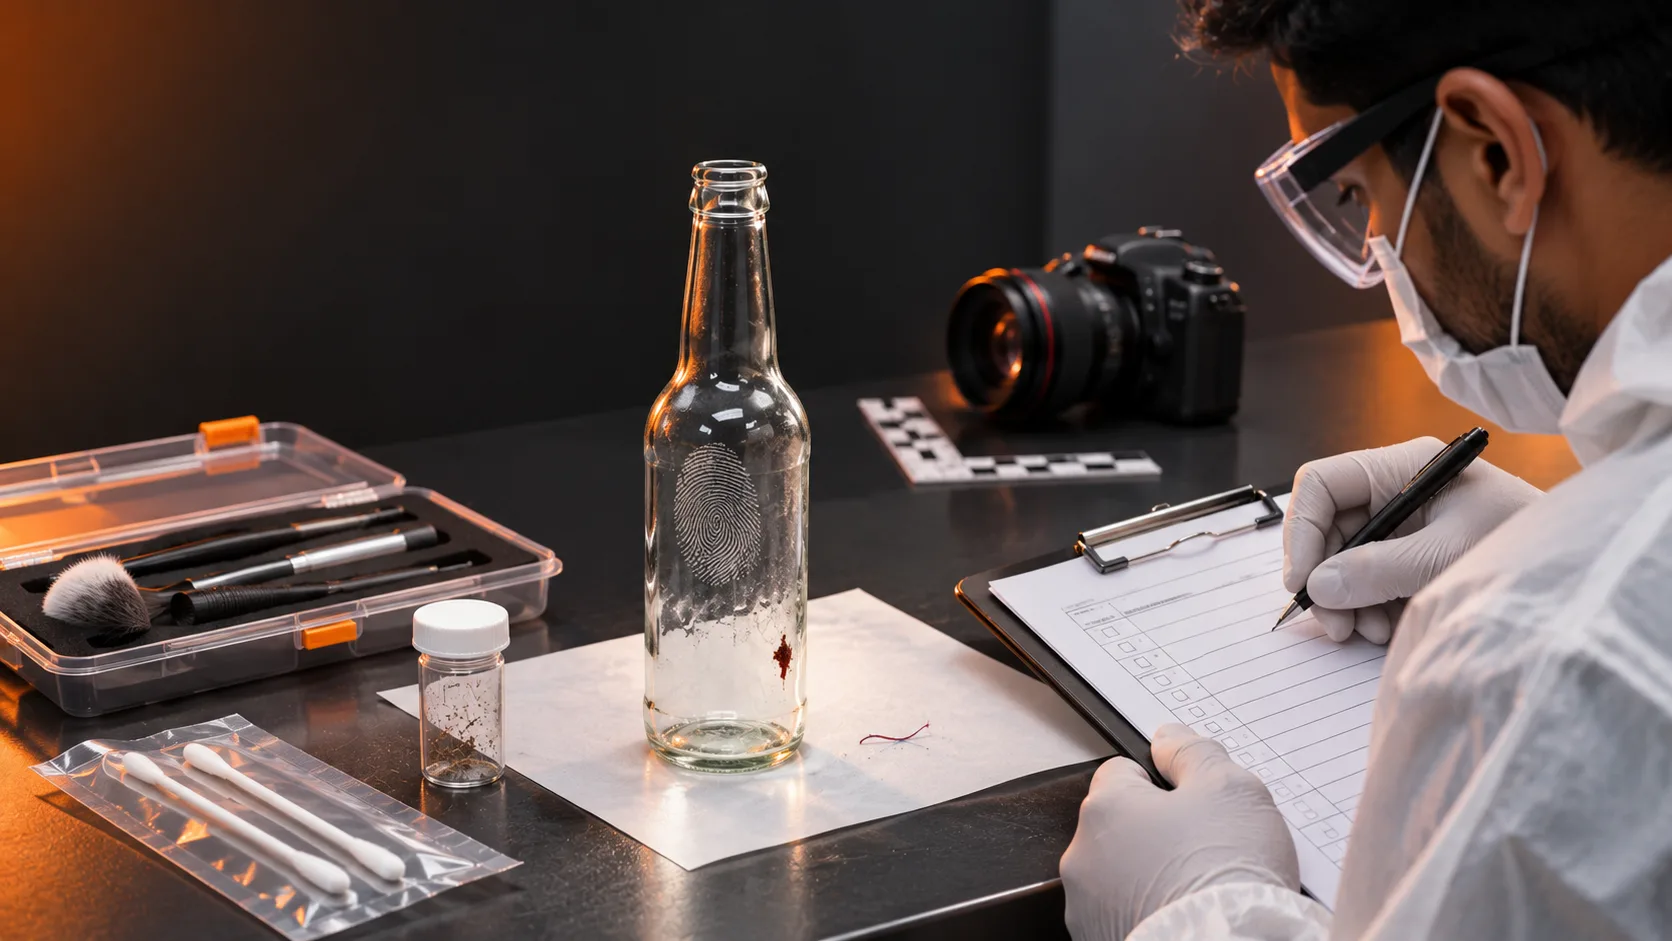
Forensic evidence Evidence is any form of proof, such as objects, materials, or scientific findings, presented to establish or disprove a fact in a legal proceeding. It is used to reconstruct events and link or exclude individuals Read Full Definition recovery sequence is the planned order in which an exhibit or crime scene is documented, examined and sampled when it may contain more than one type of evidence. A handled bottle can carry microscopic glass or fibers, latent fingermarks and biological material suitable for DNA profiling
 DNA profiling, also known as DNA fingerprinting, is a significant technique in forensic science that identifies individual's unique DNA patterns for various purposes such as establishing familial relationships or tracing genealogical roots. The technique, which Read Full Definition. A garment may contain visible blood, adhering hairs, foreign fibers and impressions. If an investigator immediately swabs, brushes, tapes, sprays or casts the surface, some of those opportunities may change or disappear.
- Why does evidence recovery order matter?
- The evidence recovery decision framework: six stages
- Which forensic examinations can interfere with one another?
- DNA and latent fingerprints: which should be recovered first?
- Trace evidence: why early recognition can matter
- Impression evidence: document before lifting, casting or altering
- Worked example 1: A glass bottle with touch DNA, fingermarks and loose fibers
- Worked example 2: A suspected bloody fingerprint on a door frame
- Worked example 3: A jacket containing biological stains and foreign fibers
- Worked example 4: A footwear impression in blood on a floor
- A practical examination-sequencing record
- Common mistakes and scientifically unsupported claims
- Evidence recovery sequence checklist
- Frequently asked questions
- References and authoritative sources
There is no universal rule that DNA DNA, or Deoxyribonucleic Acid, is the genetic material found in cells, composed of a double helix structure. It serves as the genetic blueprint for all living organisms. Read Full Definition, fingerprintsFingerprint, impression made by the papillary ridges on the ends of the fingers and thumbs. Fingerprints afford an infallible means of personal identification, because the ridge arrangement on every finger of every human being is Read Full Definition, trace evidenceTrace evidence - Physical evidence that results from the transfer of small quantities of materials (e.g., hair, textile fibers, paint chips, glass fragments, gunshot residue particles). Read Full Definition or impressions must always be collected first. A scientifically defensible sequence considers the location and condition of each trace, the methods planned, possible transfer or destruction, time-sensitive risks, and the capability of the receiving laboratory. The preferred course may be to recover the whole item and plan controlled examinations at the laboratory rather than process every trace at the scene.[1][2][4][5]
This guide focuses on the interaction between disciplines, not a repeat of detailed DNA swabbing or fingerprint-development protocols. It provides a decision framework, examination-interference matrix, documentation template, four hypothetical worked examples, common mistakes and frequently asked questions.
Key Takeaways
Multidisciplinary evidence recovery requires an item-specific plan, not a universal test order.
- Document the intact item and identify possible DNA, fingermark, trace and impression evidenceImpression evidence - Objects or materials that have retained the characteristics of other objects that have been physically pressed against them Read Full Definition before any interfering treatment.
- Evaluate cross-disciplinary interference on the relevant substrate and regions; a method can preserve one trace while compromising another.
- Coordinate competing examinations with the receiving laboratory and consider intact-item submission whenever practical.
- Record the chosen sequence, treatment history, subsampling decisions and limits on what a negative result can establish.
Practical principle
Why does evidence recovery order matter?
Different forensic examinations act on the same substrate in different ways. Swabbing can remove or redistribute material from a surface; applying fingerprint powder or chemical reagents can alter the surface and potentially affect downstream biological testing; collecting fibers with adhesive tape can disturb an impression or latent fingermark; and lifting or casting a mark may physically change the original surface.[2][4][5][6]
The key is not to classify entire disciplines as ‘destructive’ or ‘non-destructive.’ Even a relatively low-impact visual examination may involve moving the item, changing its position or exposing it to a hazard. Conversely, some processing methods can be compatible with subsequent examinations under particular validated conditions. Risk depends on the method, substrate, target location, amount of material and subsequent test.
At a multi-evidence scene, investigators should document the original position and condition before disturbing it. Identify potential fragile or perishable evidence and prioritize emergency protection when integrity is threatened. Good sequential practice combines timely preservation with the ability to explain why certain evidence was processed before another.[1][2]
The evidence recovery decision framework: six stages
Context, condition, location, photographs and hazards
Are potential traces vulnerable, co-located or separable?
Could movement, swabbing or powdering dislodge particles?
Could treatment compromise target material?
Could sampling or tape contact alter ridge detail?
Has detail been photographed before alteration?
May include intact submission, separate regions or specialist processing
Not a mandatory order for collecting evidence. The appropriate branch and sequence depend on the item and laboratory methods.
- Protect and document. Address safety, legal authority and access control; photograph, note and map the intact item and relevant traces before moving or contacting them.
- List competing examination opportunities. Consider biological stains, touch DNADNA recovered from a surface or object after contact, which can originate from skin-associated cells or other transferred biological material., visible and latent fingermarks, hairs and fibers, glass or paint, impressions, chemical residues, and any case-specific specialty examinations.
- Identify vulnerability and interference. Ask what may be lost through drying, movement, swabbing, tape lifting, powders, cyanoacrylate, chemical treatment, casting, laboratory disassembly or destructive testing.
- Seek specialist coordination. Where tests compete for one surface or limited material, agree a case-specific sequence between the scene examiner, DNA specialist, fingermark practitioner and trace/impression examiner before treatment.
- Perform and record the chosen steps. Keep distinct target areas, sample IDs, tool changes and treatment histories traceable; capture any developing result before an additional step could alter it.
- Review and disclose limitations. Record which examinations were attempted, deferred or precluded, the reason for the order, changes to the item, and consequences for later evaluation.[1][3][4][5]
Figure 1 should be read as a decision process with branching choices, not a fixed order of DNA → fingerprints → trace evidence. A case may have no safe or justified field sampling step and proceed directly to intact-object submission.
Which forensic examinations can interfere with one another?
| Proposed action | Other evidence it may affect | What to consider first |
|---|---|---|
| Swab a handled surface for DNA | Latent ridge detail; loose fibers or dust; spatial distribution of residue | Photograph visible detail, assess trace particles, define sampling area and consult fingermark personnel if needed |
| Powder or brush for latent fingermarks | Touch DNA, loose trace particles, ridge detail elsewhere through transfer | Prioritize competing traces, change or control brushes and powders; plan the DNA opportunity |
| Apply fingermark chemicals | DNA recovery, body-fluid or chemical examinations, surface appearance | Check substrate-specific validated sequence and treatment compatibility |
| Adhesive tape lifting for fibers | Touch DNA and fingermarks in the contacted region; spatial distribution of particles | Document exact trace position and recover fragile particles with the least interfering technique |
| Cast or lift footwear/tire marks | Original impression shape, surrounding loose trace and underlying surfaces | Take suitable examination-quality photographs and measure before alteration |
| Remove fabric or cut an exhibit | Stain morphology, location of trace particles and potential edges/toolmarks | Document, coordinate disciplines and preserve a map of every subsample |
DNA and latent fingerprints: which should be recovered first?
May remove or redistribute material and disrupt fingermark detail
Some powders or chemicals may compromise later DNA recovery
Potential effects vary by processing technique, specimen and substrate; the arrows do not imply every method causes the same loss.
A commonly encountered conflict is a bottle, knife handle, door handle, adhesive tape or fired cartridge case submitted for both fingermark examination and DNA profiling. Both may depend on material located in the same small area. The fingermark examination seeks ridge detail and the DNA examination seeks recoverable human DNA; a positive outcome in one does not guarantee a positive outcome in the other.
NIJ training material advises consultation with laboratory personnel because latent-print development may affect DNA recovery, while DNA sampling can affect fingerprints. The UK Forensic Science Discover the fascinating field of Forensic Science, the application of scientific principles to legal matters. This post delves into its many disciplines, from DNA analysis to crime scene investigation, its importance in the justice system, Read Full Definition Regulator’s scene-contamination guidance states that sequencing should minimize contaminationContamination - The unwanted transfer of material from another source to a piece of physical evidence. The inadvertent touching of a weapon, thereby adding fingerprints to it is an example of evidence contamination. Read Full Definition risks and gives recovery of DNA before fingerprint powdering as an ideal in the relevant circumstances, with mitigations when that is impracticable.[5][11]
That is not a universal command to swab every object before any fingermark activity. A clearly visible ridge impression may warrant appropriate photography before contact. A fragile or unique mark might be prioritized for suitable preservation, while DNA could be sampled from a separate region. If both are believed to occupy exactly the same small surface, an interdisciplinary decision should be documented rather than quietly allowing one test to consume the other.
What does the recent research say?
A 2026 Journal of Forensic Sciences study assessed DNA recovery after nine latent-print processing methods using standardized deposits on glass, paper, brass cartridge cases and adhesive tape. The authors reported significant reductions in recovered DNA after several treatments, including 1,2-indanedione, ninhydrin and physical developer in their tested conditions. Cyanoacrylate fuming and rhodamine 6G did not produce statistically significant reductions in that experimental model. This is evidence of method-dependent effects, not proof that the latter treatments are harmless across every substrate, sample size or DNA workflow.[7]
A separate 2024 study on black polyethylene plastic likewise investigated DNA recovery after individual and sequential latent-print treatments. Such research strengthens the rationale for substrate-specific validationValidation, often referred to as method validation, is a crucial process in the laboratory when introducing a new machine, technology, or analytical technique. It involves a series of systematic steps and assessments to ensure that Read Full Definition and coordination, but does not remove variation in real casework deposits or guarantee a successful outcome.[8]
Also distinguish the sequence within fingermark visualization from the sequence among multiple disciplines. The UK Fingermark Visualisation Manual provides substrate-specific internal processing sequences; selecting that sequence must still take account of possible DNA, trace and chemical examinations on the exhibit.[6]
Trace evidence: why early recognition can matter
Small hairs, fibers, paint chips, glass fragments and particles can be displaced by glove contact, photography equipment, swabbing, brushing, packaging friction or moving an exhibit. ANSI/ASTM E3457-25 is a published guide for detecting and preserving forensic trace evidence, added to the OSAC Registry on 2 June 2026. It emphasizes the importance of considering other examinations in planning trace recovery.[4][12]
When possible, document trace locations before movement and consider collecting the whole item with the traces retained in place. Where separate recovery is necessary, use a method suitable for the particles and substrate, with individual traceable packaging. An apparently harmless tape lift across the entire surface can remove material useful for another forensic examination or make the original distribution impossible to reconstruct.
The opposite risk also matters. Removing a fiber with forceps can disturb a nearby faint fingermark or biological stain; repeated handling of clothing can introduce foreign fibers or displace existing material. Early recognition and planning are therefore more important than an automatic instruction to collect all trace material first.[2][3][4]
Impression evidence: document before lifting, casting or altering
Context photography
Preserve location and orientation
Examination-quality images
Appropriate scale and lighting
Competing evidence review
DNA, trace and stain considerations
Suitable recovery
Lift, cast or retain original when justified
A typical planning flow, not an instruction to manipulate hazardous or fragile impressions. Some steps may require specialist consultation before recovery.
Footwear and tire impressions may be present in soil, dust, blood, snow, other soft substrates or on portable items. Many techniques for lifting, casting or chemically enhancing impressions can change the original mark. Examination-quality photography with appropriate scale, orientation and lighting is normally an essential preservation step before other manipulations when practical. Document the scene context first and then obtain suitable close views prior to lifting or casting.[1][9]
A cast is not automatically the correct first action, and a cast is not equally suitable for every surface. Some two-dimensional dust impressions may call for an appropriate lifting technique rather than a cast; a three-dimensional soil impression may be suitable for casting by trained staff. The published ANSI/ASB Best Practice Recommendation 126-20 (2022) addresses casting footwear and tire impressions at crime scenes.[9]
Sequence must also consider what lies within or beneath the impression. A bloody impression may carry stain-pattern information and biological material, while a dust mark may contain trace particles. Before wetting, lifting, electrostatically collecting or casting, coordinate any competing examinations. Do not assert that impression evidence is always the last thing to recover.
Worked example 1: A glass bottle with touch DNA, fingermarks and loose fibers
Photograph before contact; preserve detail and coordinate fingermark examination.
Record particle location; assess early controlled recovery or protected intact submission.
Choose sampling region after considering fingermark and trace targets.
Areas A–C are hypothetical and need not be physically separate. Overlapping targets may require a different plan.
Scenario (hypothetical): A glass bottle is found on a table. It has a visible ridge mark on one side, a possible handled area near the neck, and a few visible fibers near the base.
Assessment: First photograph the bottle in context and document the visible ridge mark and fibers without touching those regions. If safe and practical, submit the whole bottle in protective packaging to preserve spatial relationships. Consider photographing and separately securing the fragile loose fibers before further handling, taking care not to contact the ridge impression. Ask the receiving laboratory to agree how the visible fingermark, other potential fingermarks and DNA target regions will be managed.
Possible decision: The laboratory may preserve the visible mark photographically, sample the non-overlapping neck area for DNA, then proceed with selected fingermark treatment. Another sequence could be justified if the critical marks and DNA are co-located. Limitation: No single order is proven optimal merely because this scenario contains a bottle.
Worked example 2: A suspected bloody fingerprint on a door frame
Scenario (hypothetical): A faint reddish ridge-like mark is visible on a door frame where a person may have touched it.
Assessment: Preserve its location and appearance with appropriate overall and close photography before intrusive treatment. An investigator should not simply swab across the ridge detail or apply an enhancement reagent without evaluating what each process could change. A reagent used to enhance suspected blood impressions may affect stain distribution, ridge detail or later testing; presumptive reactions also have interpretative limits.
Possible decision: A specialist plan may preserve the morphology, then select a DNA sampling location or method compatible with the mark’s investigative value, followed by validated enhancement if justified. Limitation: The reddish appearance and presence of a ridge-like pattern do not independently establish blood origin, donor identity or event timing.
Worked example 3: A jacket containing biological stains and foreign fibers
Scenario (hypothetical): A jacket recovered from a vehicle has visible stains and several loosely adhering fibers.
Assessment: Photograph and map the jacket and visible traces. Avoid shaking, brushing or mixing areas before trace assessment. Preserve loose fibers by appropriate controlled recovery, or submit the jacket intact with safe retention measures, depending on the laboratory’s plan. Consider how tape lifting or cutting fabric could alter the location of other evidence. Manage drying and packaging according to the specimen’s actual moisture and condition.
Possible decision: A textile examiner documents and secures particularly fragile trace material, while a DNA examiner plans non-overlapping stain sampling and appropriate controls. Limitation: A fiber and a stain found together do not automatically share a common deposition event.
Worked example 4: A footwear impression in blood on a floor
Scenario (hypothetical): A patterned impression is visible within an apparent bloodstain on a floor.
Assessment: Prevent further traffic and obtain overall, midrange and examination-quality photographs, with scale as appropriate, before applying any physical or chemical process. The forensic team should consider impression morphology, potential body-fluid sampling, stain-pattern documentation and possible additional trace material. Reagent application or an indiscriminate swab can permanently alter one or more of these properties.
Possible decision: Document the impression fully, then coordinate limited biological sampling away from key detail if practicable and plan any required enhancement or lifting technique. Limitation: Neither the pattern alone nor an associated DNA profile automatically establishes when the mark was formed or who deposited the material.
A practical examination-sequencing record
The analyst’s record must explain why the chosen order was appropriate, especially when another examination was postponed, partially sampled or precluded. A short but specific agreement made before treatment is more useful than a generic sentence written only after the tests have been completed.
| Record element | Information to capture |
|---|---|
| Exhibit identifier | Unique exhibit number and every later sample or subsample ID |
| Original observations | Location, condition, visible stains/marks, suspected traces and photos |
| Requested examinations | DNA, fingermarks, trace, impression, chemical or other tests |
| Interference assessment | Which proposed action may affect another result? |
| Consultation and decision | Who agreed the order, when, on what basis? |
| Actual work performed | Treatments, operators, times, areas, tools, controls and changes |
| Deferred or precluded tests | Reason, remaining material and whether further work remains possible |
| Transfer and review | Packaging, chain-of-custody, laboratory handover and quality review |
Common mistakes and scientifically unsupported claims
Myth
Always collect DNA first.
Reality
Not a universal rule: the location of relevant traces and consequences for competing examinations must be considered.
Myth
Develop all fingerprints before swabbing.
Reality
Some treatments can reduce DNA recovery, while DNA sampling can disrupt ridges; consultation may be necessary. [5, 7]
Myth
Collecting trace evidence cannot affect anything else.
Reality
Tape lifting, forceps and repeated handling can disturb marks and DNA-bearing areas. [4]
Myth
Photographs replace preserving impressions.
Reality
Suitable photographs are important, but appropriate lifting, casting or intact-item recovery may also be necessary. [9]
Myth
A negative result proves the material was absent.
Reality
Prior treatment, degradation, collection limitations and the test's detection capability must be considered.
Myth
A prescribed fixed order fits every case.
Reality
Validated methods, local jurisdictional requirements and case-specific risks can produce different defensible sequences. [1, 6]
Sources for the Myth & Reality comparisons: Fingermark processing [5], [7]; trace evidence [4]; impression recovery [9]; examination sequencing [1], [6].
Evidence recovery sequence checklist
Educational self-review only: checking an item does not establish laboratory QC acceptance.
Frequently asked questions
Frequently Asked Questions
What is the correct order for collecting DNA, fingerprints and trace evidence?
There is no single universal sequence. Document the intact exhibit, assess all evidence opportunities, consider vulnerable traces and method interference, then choose and record a case-specific order with the laboratory where needed.
Should DNA be swabbed before fingerprint powdering?
DNA recovery before powdering may be appropriate to avoid contamination or loss in some situations, but swabbing can also damage latent ridge detail. The decision depends on the exhibit, surface, target locations and validated procedures.
Does cyanoacrylate fuming always destroy DNA?
No. Effects vary. A 2026 experimental study found no significant loss under its tested cyanoacrylate conditions, but that result does not guarantee compatibility for every casework sample, extraction method or substrate.
Should trace particles be recovered before DNA sampling?
Often early consideration is important because swabbing and other handling can dislodge or redistribute particles. However, the trace recovery technique can itself affect DNA or fingermarks, so the plan must consider both directions of interference.
Do footwear impressions need photographs before casting?
Generally, appropriate examination-quality photographs with scale and context should be taken before intrusive recovery when practical. Casting or lifting is a separate, substrate-dependent decision and should be undertaken by trained personnel.
Can investigators divide one object into separate testing regions?
Sometimes. A laboratory may allocate different areas for different examinations if the physical layout and evidence allow it. This requires precise"Precise" refers to the degree of closeness or consistency between multiple measurements or values taken under the same conditions. It indicates how well these measurements agree with each other, regardless of whether they are accurate Read Full Definition mapping and documented selection because the distribution of traces itself may be evidentially important.
What happens if fingerprint processing occurs before DNA sampling?
Do not assume the DNA result is invalid or unaffected. Record the exact treatments and conditions, consult the DNA laboratory about possible effects, and interpret any result with the available validation and case information.
Is the least destructive method always performed first?
Non-contact documentation and minimizing initial disturbance are strong general principles, but the least destructive technique within one discipline is not always the optimum first action for a multidisciplinary exhibit. Protection of fragile evidence and interference must also be considered.
What should be recorded when one test may compromise another?
Document exhibit condition, intended examinations, competing locations, specialists consulted, the chosen sequence and rationale, actual treatment history, subsamples, deferred tests and material remaining.
Can the entire exhibit be sent to the laboratory instead of sampling it at the scene?
Often that is preferable when the exhibit can be safely transported and properly preserved. Intact submission can retain spatial relationships and allow specialists to coordinate the order under controlled conditions.
Related Simply Forensic Articles
References and authoritative sources
Research and standards review: 14 November 2026. Guidance, published standards and experimental findings are identified by source. The UK statutory Code of Practice has jurisdiction- and activity-specific applicability; NIST/OSAC listing does not automatically make a standard mandatory for every laboratory.
References & Sources
Show referencesHide references
- National Institute of Justice (2013). Crime Scene Investigation: A Guide for Law Enforcement. Source
- National Institute of Justice. Crime Scene and DNA Basics for Forensic Analysts: Location and Collection of Evidence (archived training guidance). Source
- National Institute of Justice. Crime Scene and DNA Basics for Forensic Analysts: Collection Techniques (archived training guidance). Source
- NIST/OSAC (2026). ANSI/ASTM E3457-25, Standard Guide for Detection and Preservation of Forensic Trace Evidence (published standard; OSAC Registry 2 June 2026). Source
- UK Forensic Science Regulator (2023). Contamination Controls: Scene of Crime, FSR-GUI-0016. Source
- UK Defence Science and Technology Laboratory and Home Office (2024 release). Fingermark Visualisation Manual, Second Edition; guidance and publication information. Source
- Graham, E., Steffan, S., and Culbertson, H. (2026). Destructiveness of latent print
 A latent print is an invisible fingerprint created by the transfer of sweat and oils to a surface. In forensics, these prints must be developed using powders or chemicals like ninhydrin to become visible for Read Full Definition processing techniques to DNA analysis. Journal of Forensic Sciences. doi:10.1111/1556-4029.70486. Source DOI: 10.1111/1556-4029.70486
- National Institute of Justice (2024). DNA Recovery After Sequential Processing of Latent Fingerprints on Black Polyethylene Plastic (research summary). Source
- NIST/OSAC. ANSI/ASB Best Practice Recommendation 126-20 (2022), Casting Footwear and Tire Impression Evidence at the Crime Scene. Source
- UK Forensic Science Regulator (2025). Forensic Science Activities: Statutory Code of Practice, Version 2 (England and Wales). Source
- NIJ. Collecting DNA Evidence at Property Crime Scenes: Training Materials and Equipment Guidance (archived training course). Source
- NIST/OSAC. Forensic Science Standards Library (status and adoption information for published and proposed standards). Source
Educational notice: This is a multidisciplinary planning framework. It does not replace validated laboratory procedures, the professional judgement of trained examiners, scene safety rules, evidence-handling policies or applicable law.