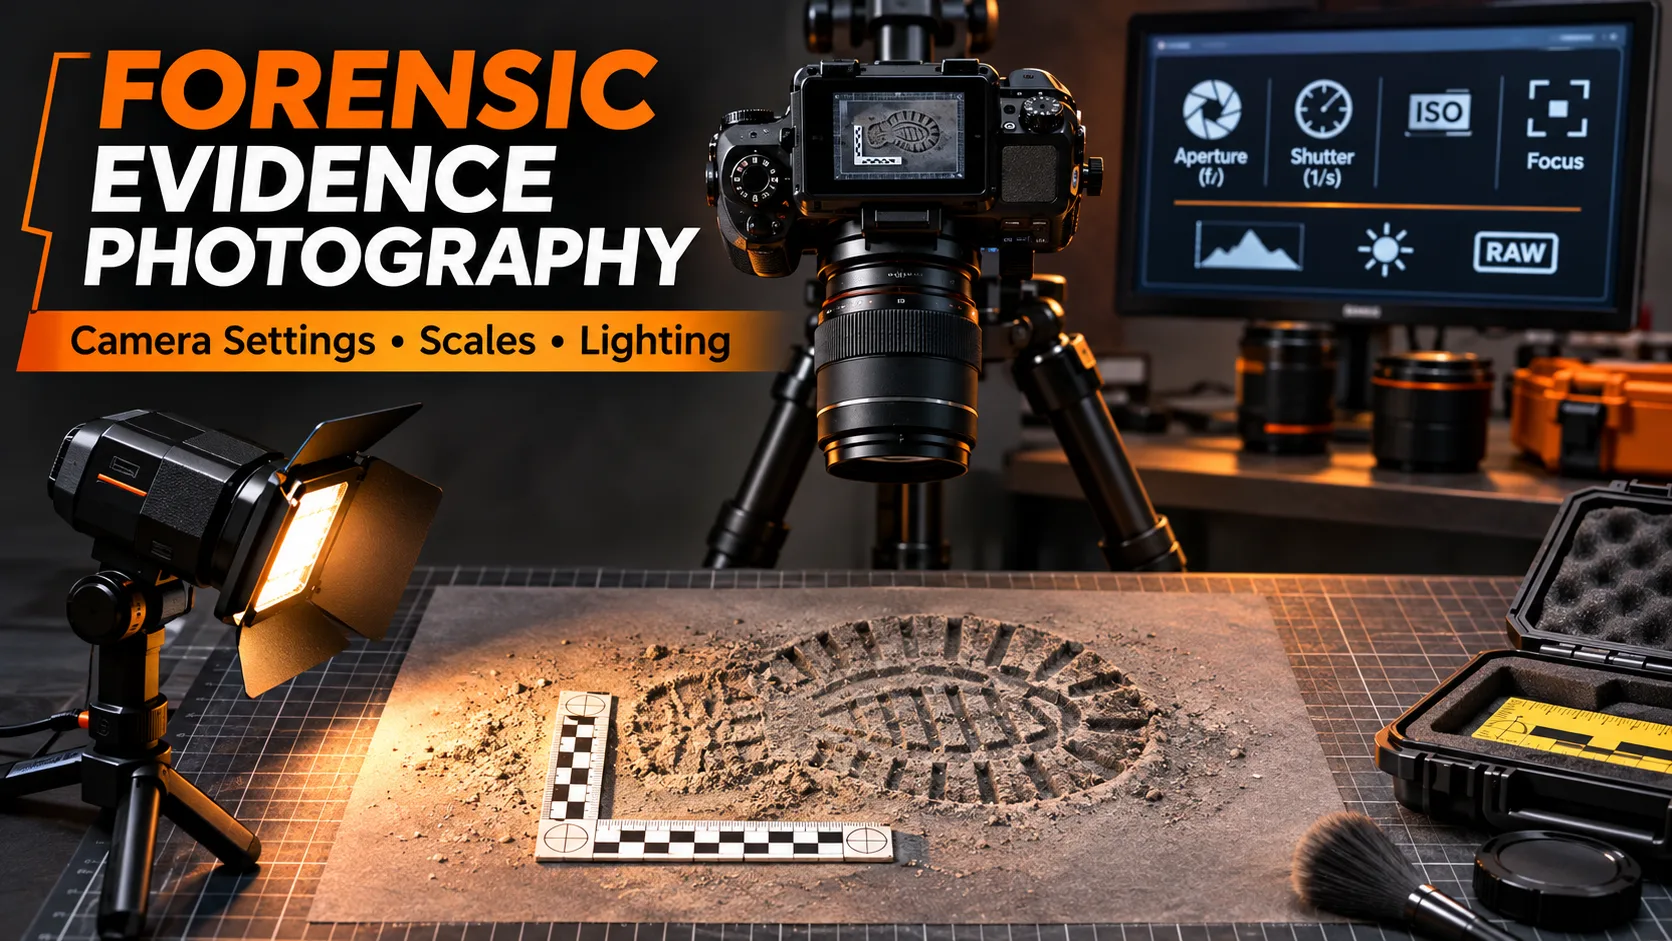
Forensic photography settings should be selected for the evidence Evidence is any form of proof, such as objects, materials, or scientific findings, presented to establish or disprove a fact in a legal proceeding. It is used to reconstruct events and link or exclude individuals Read Full Definition being documented, not copied from a generic camera-settings chart. A photograph may look bright and attractive yet fail to preserve fine pattern detail, natural color, the dimensions of an impression or the original context of an exhibit. Conversely, a technically controlled image may look plain but be far more useful for scientific examination.
- 1. Decide What the Photograph Must Demonstrate
- 2. Aperture, Shutter Speed and ISO: The Exposure Triangle
- Aperture (f-number): light and depth of field
- Shutter speed: exposure time and unwanted motion
- ISO: exposure index, amplification and image noise
- 3. Focus, Depth of Field, Lenses and Macro Photography
- 4. Forensic Photographic Scales: Placement and Measurement Accuracy
- 5. Lighting Techniques: Reveal Detail Without Misrepresenting It
- 6. RAW Versus JPEG, White Balance and Digital Image Integrity
- 7. Three Hypothetical Photography Troubleshooting Scenarios
- Scenario A: Sharp scale, blurred footwear detail
- Scenario B: Glare hides markings on a metal object
- Scenario C: Dark outdoor scene and moving leaves
- 8. Field and Laboratory Image-Quality Checklist
- Frequently Asked Questions
- References and Authoritative Technical Sources
This practical guide explains aperture, shutter speed, ISO, focus, white balance, file formats, forensic measurement scales and lighting. It separates general scene documentation from comparison-quality photography, and includes method-selection tables, hypothetical examples, common failure modes and technical references through November 2026. Readers new to the photographic sequence should first consult our companion guide to overall, mid-range and close-up photographs.
Key rule:
No single combination of f-stop, shutter speed and ISO is correct for every forensic image.
The required resolution, depth of field, motion control, lighting, contrast and dimensional accuracyIn scientific and measurement contexts, "accuracy" refers to the degree of proximity or closeness between a measured value and the true or actual value of the measured quantity. Accuracy indicates how well a measurement reflects Read Full Definition depend on the particular examination. SWGDE documents describe considerations and example procedures, not universal presets.
[1][2]- Photography task and quality
- Exposure settings
- Focus and depth of field
- Forensic scales and geometry
- Lighting techniques
- RAW, JPEG, color and integrity
- Worked scenarios
- Field checklist
- FAQs
- References
1. Decide What the Photograph Must Demonstrate
A scene overview, laboratory exhibit image, injury photograph and toolmarkA mark created when a tool or object contacts, presses, cuts or slides against another material. comparison photograph have different objectives. Overall photographs preserve general appearance and context. Item-level documentation preserves a particular item’s condition and relevant visible features. Comparison photographs require more rigorous controls so the image is suitable for analyzing fine details and, where relevant, dimensions. A scale in a photograph does not automatically turn it into valid measurement data Information in analog or digital form that can be transmitted or processed. Read Full Definition.
SWGDE’s current controlled-setting photography guidance emphasizes stable camera geometry when measurements matter, a scale in the same plane as the item, careful focus, even illumination and review after capture.[2] Its footwear-impression guidance goes further because distortion can interfere with comparison.[5]
| Task | Technical priority | Typical risk |
|---|---|---|
| Room overview | Complete spatial context and useful exposure | Very wide-angle perspective mistaken for measured distance |
| Small exhibit documentation | Visible features, identifier and coherent lighting | Scale obscuring a trace, reflective glare |
| Footwear or tire impression | Geometry, scale position, resolved pattern detail | Tilted camera or scale on wrong level |
| Low-light scene | Stability, correct exposure and truthful illumination record | Movement or selectively illuminated sections |
| Reflective surface or treated latent detail | Controlled glare, filters and lighting record | Loss of features or misleading false-color interpretation |
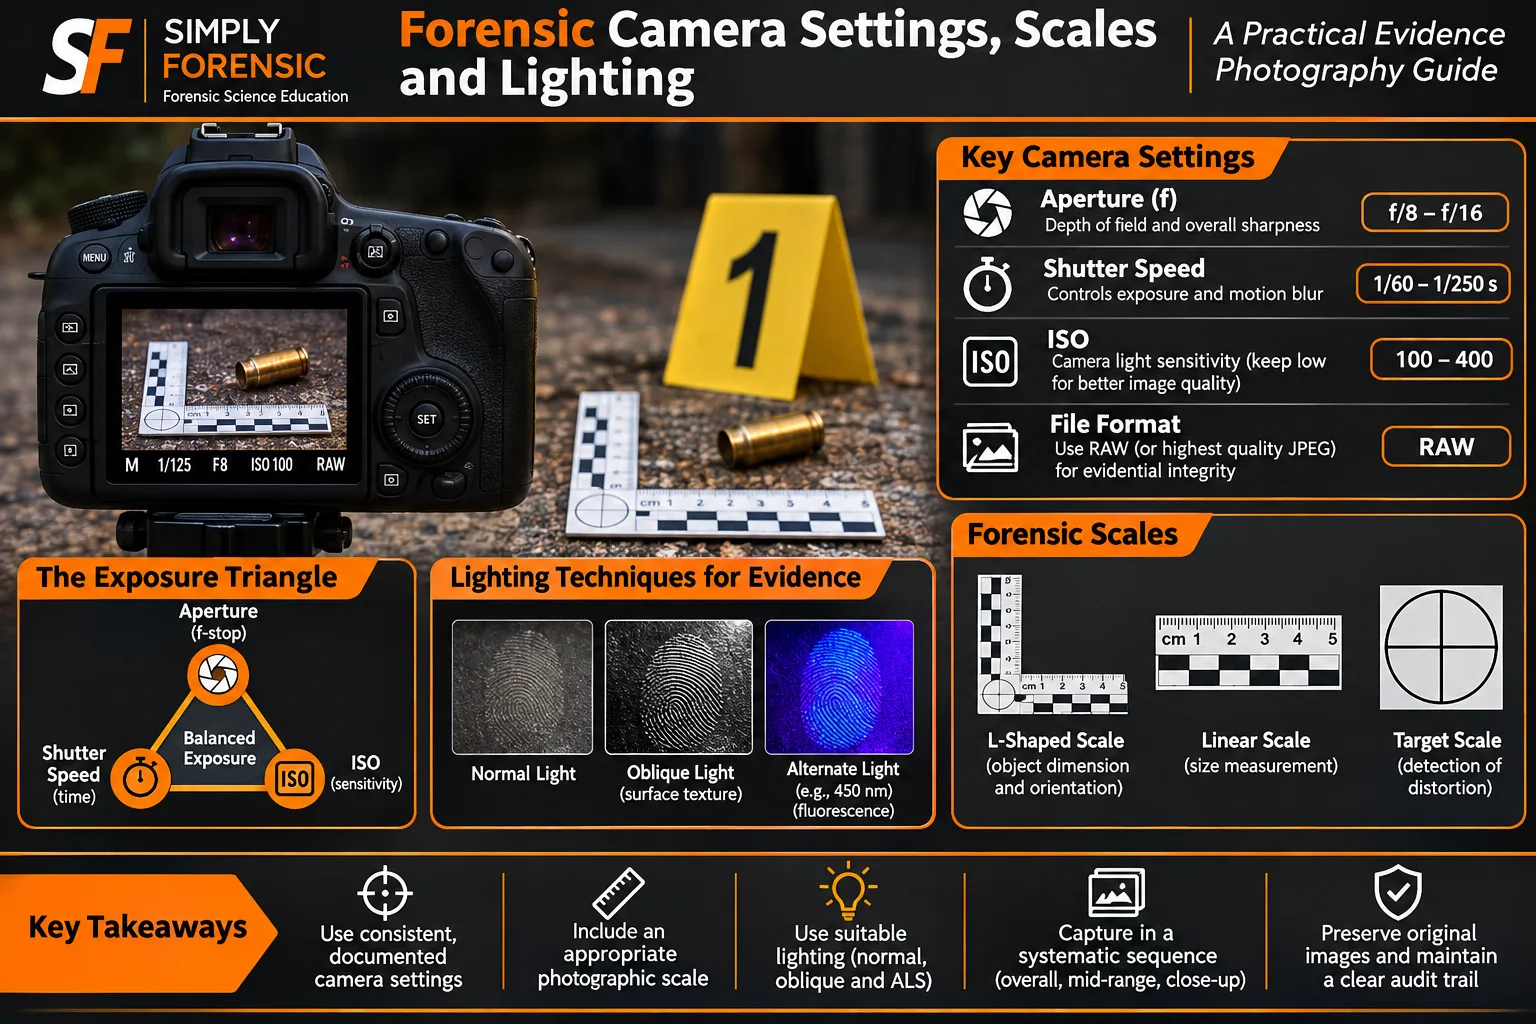
2. Aperture, Shutter Speed and ISO: The Exposure Triangle
Exposure is determined by the light reaching the camera sensor over time, together with camera processing and gain. The three controls interact, but they are not interchangeable: each has separate implications for forensic image quality. SWGDE’s 2025 technical camera overview explains sensor operation and the practical relationship among the settings.[1]
Aperture (f-number): light and depth of field
Aperture regulates the diameter of the lens opening. A lower f-number (such as f/2.8) generally lets in more light but yields a shallower depth of field. A higher f-number (such as f/11) reduces light at a given shutter speed and usually increases the range appearing acceptably sharp. The precise"Precise" refers to the degree of closeness or consistency between multiple measurements or values taken under the same conditions. It indicates how well these measurements agree with each other, regardless of whether they are accurate Read Full Definition outcome also depends on subject distance, focal length, sensor format and magnification.
For close-up evidence, greater depth of field may be necessary to retain an impression’s entire relevant surface in focus. However, stopping a lens down indefinitely is not beneficial. Diffraction increasingly softens fine detail at very small apertures; the best setting balances depth of field against resolution. For highly magnified three-dimensional subjects, several views or a carefully documented specialist technique may be preferable to treating f/22 as a universal solution.
Shutter speed: exposure time and unwanted motion
Long exposures collect light over a greater duration but may show camera movement, subject movement or changing illumination. Short exposures help freeze movement, but require enough light or adjustment of other settings. A tripod and remote release reduce camera shake when long exposures are necessary. An active fire scene, roadside work or outdoor scene exposed to wind has different motion risks from an immobilized laboratory exhibit.
For example, moving from 1/125 second to 1/60 second approximately doubles the exposure time, but it also increases the opportunity for blur. A static shoeprint on a solid support may tolerate a long exposure; a swaying curtain or moving person will not remain frozen merely because the camera is mounted on a tripod.
ISO: exposure index, amplification and image noise
Increasing the ISO setting typically allows a brighter recorded/rendered image for the same aperture and shutter speed, depending on camera behavior. The sensor does not physically capture additional photons simply because ISO is increased. Higher gain and processing can alter apparent brightness, image noise and dynamic range. Choose the lowest practical ISO compatible with the required exposure, focus, lighting and scene conditions rather than insisting on ISO 100 under every circumstance.
Exposure example, not an SOP:
A static item photographed at f/8, 1/125 second and ISO 200 is too dark. Possible responses include better illumination, a longer exposure if stable, a wider aperture if sufficient detail remains sharp, or a higher ISO if the others are unsuitable. The correct choice depends on the objective and can only be confirmed by inspecting the image.
A histogram can help detect lost detail in highlights or shadows, but a histogram of an in-camera preview does not by itself establish perfect exposure of every relevant surface. Review the actual subject at useful magnification and reshoot before collecting or disturbing the evidence.
3. Focus, Depth of Field, Lenses and Macro Photography
A camera can produce an image that appears correctly exposed while the important features are out of focus. Examine fine ridges, footwear features, fracture edges or small markings at a sufficient preview magnification. Autofocus may target a ruler or high-contrast label instead of the relevant evidence. Carefully positioned manual focus or controlled autofocus may be preferable, depending on the equipment and subject.[2]
Depth of field is the range of distances judged acceptably sharp, not a guarantee that everything in that range is resolved at the same quality. In close-up photography, a small change in distance can produce substantial focus differences. Stabilize the camera, inspect the nearest and farthest relevant portions of the evidence and acquire additional images where necessary.
Lens choice matters for perspective and distortion. A wide-angle lens helps show cramped rooms but can be unsuitable for measurement-focused close-ups. SWGDE’s 2025 footwear and tire impression guideline favors minimizing optical distortion, using suitable lens focal lengths and ensuring the imaging plane is aligned with the target plane.[5] Avoid interpreting this as a rule that wide-angle lenses should never be used for scene overviews.
Focus stacking combines multiple frames acquired at different focus distances. It may improve visual depiction of a complex stationary object in an appropriate, validated specialist workflow, but the composite is a processed derivative, may create boundaries or reconstruction artifacts, and must never be misrepresented as one unaltered exposure. Preserve each source image and document the processing.[7]
4. Forensic Photographic Scales: Placement and Measurement Accuracy
A forensic scale provides a physical reference. Common examples include straight rulers, L-shaped reference scales, circular targets and scales designed for large impressions. Select a clean, legible scale whose increments and dimensions are appropriate for the item, and whose accuracy is suitable for any intended measurement. Not every photograph needs a scale: contextual images may primarily convey location, while close-ups intended for size or comparison require more control.
For measurement-oriented images of a flat surface, keep the camera sensor plane as nearly parallel as practicable to the evidence plane. Position the scale in the same physical plane and close to, but not on top of, important features. A ruler sitting on the ground beside the rim of a deep impression may not be level with the impression floor. That difference can affect apparent dimensions. Avoid touching fragile evidence and photograph the item before scale or placard placement.[2][5]
| Placement | Consequence | Corrective action |
|---|---|---|
| Scale beside a flat stain, in the stain plane | Can provide an appropriate reference if geometry is controlled | Check lens alignment and scale condition; photograph unscaled first |
| Scale higher than the relevant impression surface | Different camera-to-scale and camera-to-evidence distances | Use a method appropriate to impression depth without damaging the evidence |
| Camera sharply angled toward the surface | Perspective distortion and varying magnification across frame | Reposition for measurement-focused view; retain oblique context view separately |
| Scale hides marks or risks contaminationContamination - The unwanted transfer of material from another source to a piece of physical evidence. The inadvertent touching of a weapon, thereby adding fingerprints to it is an example of evidence contamination. Read Full Definition | Loss or alteration of relevant information | Move scale, use a suitable smaller scale, or omit when unsafe; document reason |
Does the ABFO No. 2 scale automatically guarantee accuracy? No. NIST researchers found manufacturing variability in commercially available forensic reference scales. A familiar printed design is not proof of dimensional traceability. When exact measurement matters, scale quality, camera geometry, calibrationThe act of checking or adjusting (by comparison with a standard) the accuracy of a measuring instrument. Operation that, under specified conditions, in a first step, establishes a relation between the quantity values with measurement Read Full Definition and method limitations need consideration.[6]
Camera sensor plane ≈ parallel to flat evidence plane. Scale ≈ same plane as measured detail.
Parallel bars represent aligned planes.
Camera tilted to subject. Scale elevated above or below evidence level.
Conceptual diagram only; not to scale.
Original Simply Forensic schematic. It illustrates plane alignment, not a calibrated procedure or a substitute for laboratory validationValidation, often referred to as method validation, is a crucial process in the laboratory when introducing a new machine, technology, or analytical technique. It involves a series of systematic steps and assessments to ensure that Read Full Definition.
5. Lighting Techniques: Reveal Detail Without Misrepresenting It
Lighting affects contrast, shadow, reflection and the visibility of surface features. The objective is not simply to make the scene bright. It is to record details relevant to the examination in a way that can be understood and, where needed, repeated. SWGDE publishes specific guidance for general lighting and for low-light crime scene photography.[3][4]
| Lighting method | Useful application | Important limitation |
|---|---|---|
| Diffuse or even light | Exhibit overview, neutral record of condition | May under-represent shallow texture |
| Oblique (side) light | Shallow footwear detail, impressions, toolmark texture | Shadow length depends on angle; may exaggerate apparent relief |
| Multiple directions of light | Examining whether a mark is visible under changing direction | Keep separate capture records; do not combine exposures without documenting |
| Cross-polarized lighting | Reduce certain surface reflections | May change color/contrast rendering; retain normal-light reference |
| Available light/long exposure | Large dim scene where flash coverage is insufficient | Motion, color cast and changes in ambient light |
| Flash or multiple flashes | Control illumination of wide or blocked areas | Hotspots, flare, uneven illumination and shadows |
| Light painting | Large scene in darkness requiring long-exposure coverage | A composite lighting pattern within one exposure, not uniform instant illumination |
| ALS/fluorescence | Visualize particular fluorescent or treated materials | Optical response is not chemical identification; document filters and wavelengthWavelength is a fundamental concept in the study of waves, whether they are associated with sound or light. It refers to the distance between two successive points on a wave, commonly measured from crest to Read Full Definition |
Low-light field photography
The SWGDE March 2026 guideline discusses available-light long exposures, flash, light painting, alternate light sources, chemiluminescence and laser trajectory imaging. It emphasizes selecting methods according to the conditions, using stable camera supports where necessary, reviewing captured results and recording the relevant technique.[3]
Light painting can illuminate a large room or outdoor area through a long exposure while a light source is moved. Although useful, it does not create a uniform single-instant record. Document where and how light was applied, and retain conventional contextual images whenever feasible. Specialist chemiluminescent and laser procedures need dedicated training, safety precautions and method controls rather than casual adaptation of a sample camera setting.
Alternate light sources: fluorescence is a visualization method
Use a compatible excitation source, barrier filter and appropriate protective eyewear. Record wavelengths and filter combinations when relevant. Some stains, fibers, treated fingerprint residues and other materials may fluoresce or show contrast, but the optical response alone does not establish material identity. Photograph ordinary-light context and record enhancement separately. This is an imaging practice, not a substitute for laboratory identification.
6. RAW Versus JPEG, White Balance and Digital Image Integrity
A RAW capture generally provides sensor-origin data with greater flexibility for carefully controlled conversion, while a JPEG is typically a camera-rendered, compressed image. The choice should be guided by the agency’s equipment, validated workflow and intended use. A RAW file is not automatically a truthful or admissible photograph; a JPEG is not automatically invalid. Compression, in-camera processing and repeated saving can affect detail and metadata.[1][7]
White balance changes how illumination colors are rendered. Mixed lighting—such as warm indoor lamps, daylight and flash—can create different color casts in one image. When color is important, control the illumination, use appropriate reference targets and record the method. Do not claim a photograph establishes the precise color of a trace without considering lighting, camera and display conditions.
Retain original files securely and work on copies for adjustments. Record any consequential cropping, exposure changes, denoising, sharpening, perspective correction or compositing. Cryptographic file hashes can support integrity comparisons between known versions, but they do not prove the identity of the photographer, the correctness of metadata, or that a scene was unaltered when photographed.[7]
Forensic image enhancements should not create detail or conceal original content. Generative AI reconstruction should never be presented as an original evidentiary image. Retain the source photographs even when a visualization is useful for teaching or analysis.
7. Three Hypothetical Photography Troubleshooting Scenarios
All examples below are invented educational scenarios. Values are illustrative and are not recommended SOP settings.
Scenario A: Sharp scale, blurred footwear detail
A footwear impression photograph is correctly illuminated, but the ruler is sharp while the impression’s central tread features are soft. The camera’s autofocus selected the higher-contrast scale, and the subject surface lies at a different distance. Response: review focus magnified on the impression itself, align the camera and scale appropriately, adjust depth of field within lens limits, and repeat before lifting or casting. Multiple controlled views may be required. Do not claim the image is comparison quality merely because its scale is sharp.
Scenario B: Glare hides markings on a metal object
A reflective metal object shows a white hotspot across its relevant stamped marking under direct flash. Response: photograph its unaltered overall appearance, then reposition the light to avoid specular reflection, consider diffuse or polarized illumination when appropriate, and record the lighting changes. Obtain more than one view if necessary. Do not rely on destructive exposure editing to recover detail that was never captured.
Scenario C: Dark outdoor scene and moving leaves
An outdoor scene at night contains a static damaged gate and wind-driven vegetation. A long exposure produces a clear gate but blurred leaves. Response: retain the available-light view as a record of its particular exposure, add suitable flash or supplemental light to document details requiring shorter exposure, and note the method. The different photographs reflect different time windows and should not be described as interchangeable freeze-frames.
8. Field and Laboratory Image-Quality Checklist
- Identify the purpose: context, condition, fine feature or dimensional comparison.
- Document original condition before placing a scale, label or lighting apparatus that alters the scene.
- Choose an appropriate lens, camera geometry, lighting and exposure, rather than a fixed settings recipe.
- Check subject focus, exposure, glare and depth of field at useful magnification.
- Where measuring, use a suitable reference scale at the relevant depth and record geometry limitations.
- Use supplementary lighting only as needed and document special wavelengths, filters and techniques.
- Capture orientation, mid-range and close-up views as required by the scene and item.
- Record image IDs, capture conditions, time-setting reliability, exhibit identifiers and significant changes.
- Preserve unaltered originals, distinguish processed derivatives and follow approved storage procedures.
For scene-wide visual documentation, see Crime Scene Documentation Mastery. For impression-specific recovery and comparisons, see Footwear Impression Evidence. For the role of photography in structured examination, see Crime Scene Investigation: A Comprehensive Guide. For method fitness and limitations, see Forensic Method Validation.
Frequently Asked Questions
Frequently Asked Questions
What are the best forensic photography camera settings?
There are no universal best settings. Aperture, shutter speed, ISO, focal length, focus and illumination should be selected to show the intended evidence detail and controlled for the particular scene or comparison task.
Should forensic photographs always use f/8 or f/11?
No. These may be practical starting points in some situations, but depth of field, lens sharpness, diffraction, magnification, available light and intended use can justify different choices.
Do all evidence photographs require a measuring scale?
No. Contextual photos may not require one. Measurement- or comparison-oriented views commonly need an appropriate scale, positioned in the same relevant plane without disturbing or obscuring evidence.
Does a scale in a photograph make the measurement accurate?
Not automatically. Camera tilt, lens distortion, scale manufacturing error, noncoplanar placement and evidence depth can create measurement uncertaintyA parameter describing the dispersion of values reasonably attributable to a quantity being measured under a defined measurement model..
Is a high ISO value unacceptable for forensic work?
Not automatically. A high setting may be necessary to freeze movement or document dim conditions, but image noise and loss of detail must be assessed for the particular examination.
What is oblique lighting used for?
Side lighting can create shadows that emphasize surface relief, including impressions and toolmarks. Results depend on illumination direction, so the setup should be documented and, when useful, repeated from different directions.
Can an alternate light sourceAlternate light source - Special lighting device that produces visible and invisible light at various wavelengths to help investigators locate and visually enhance items of evidence (e.g., fluids, fingerprints, clothing fibers). Read Full Definition identify blood or semen from fluorescence?
No. Fluorescence or optical contrast is a visualization observation that may guide further testing; it does not alone establish the identity of a material.
Frequently Asked Questions
Is a RAW file automatically authentic?
No. File format does not itself establish source authenticity, proper documentation or image integrity. Original preservation, transfer records, access controls and appropriate verification remain necessary.
Can AI-generated images be used as forensic photographs?
AI-generated images can illustrate concepts when transparently labeled, but they must not be presented as authentic scene photographs or evidence capture.
References and Authoritative Technical Sources
References & Sources
- SWGDE (2025). Technical Aspects of Digital Cameras, 25-P-001-1.0. Official Source
- SWGDE (2025). Guidelines for Evidence Photography in a Controlled Setting, 18-P-001-2.0. Official Source
- SWGDE (2026). Guidelines for Low Light Crime Scene Photography, 21-P-001-1.1. Official Source
- SWGDE (2022). Lighting Techniques in Forensic Photography, 21-P-002-1.0. Official Source
- SWGDE (2025). Guidelines for Digital Imaging of Footwear and Tire Impressions, 17-P-003-2.0. Official Source
- Ferrucci M, Doiron TD, Thompson RM, Jones J, Freeman AJ, Neiman JA (2015). Dimensional Review of Scales for Forensic Photography. Journal of Forensic Sciences.. Official Source
- SWGDE (2025). Best Practices for Maintaining the Integrity of Imagery, 17-I-001-1.1. Official Source
- National Institute of Justice (2013). Crime Scene Investigation: A Guide for Law Enforcement.. Official Source
- SWGDE. Photography committee: current guidance and updates. Official Source
Scope and provenance. Educational guide prepared for Simply Forensic using publicly accessible technical guidance checked through 15 November 2026. The featured artwork and infographic were AI-generated for education, not captured case evidence. The measurement-plane schematic is original educational HTML. No sample camera exposure shown here is presented as a validated universal procedure. Follow current agency SOPs, equipment instructions, safety requirements and applicable standards.