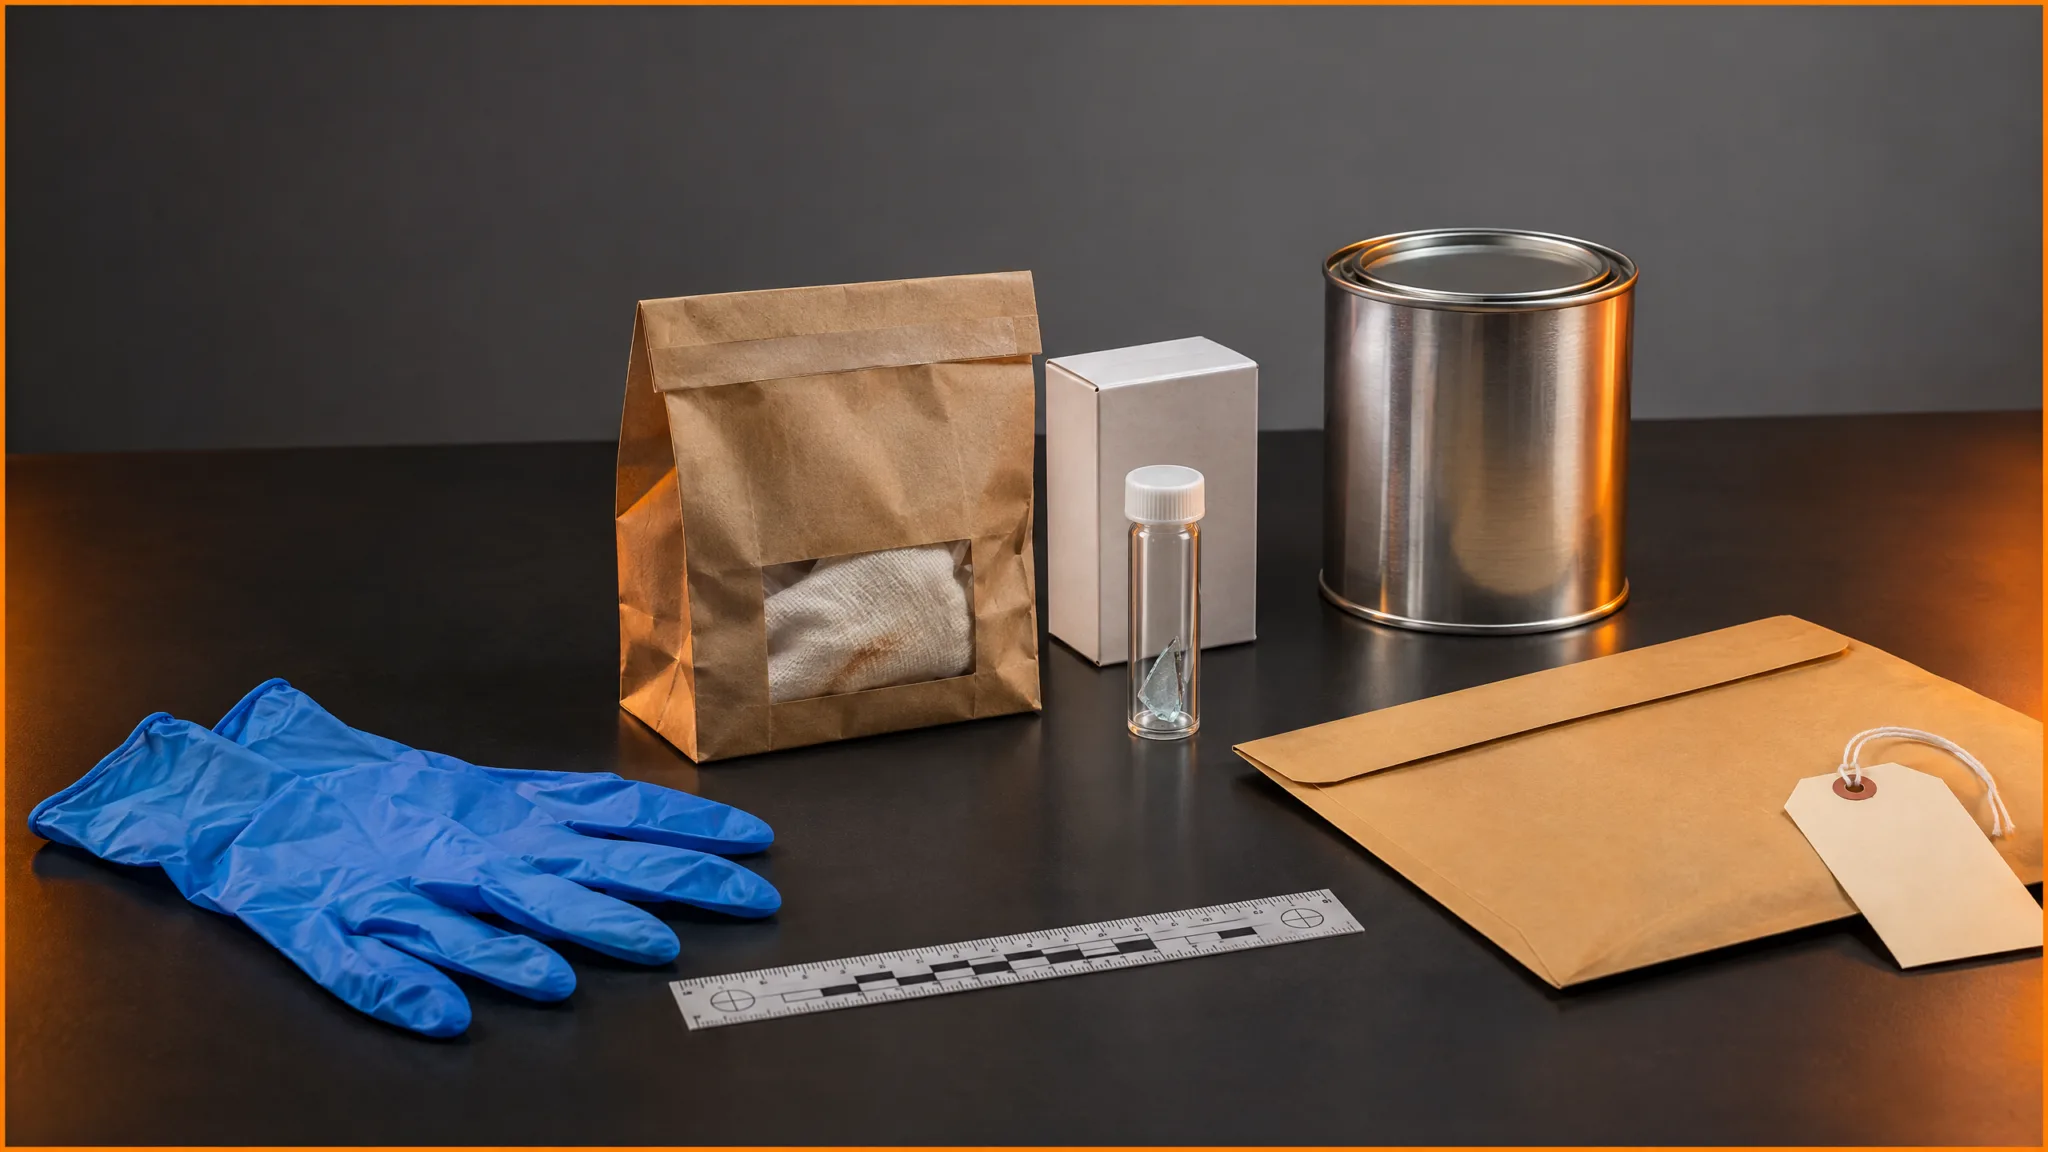
Crime scene evidence Evidence is any form of proof, such as objects, materials, or scientific findings, presented to establish or disprove a fact in a legal proceeding. It is used to reconstruct events and link or exclude individuals Read Full Definition preservation begins before an item is lifted and continues through packaging, transport, storage, examination and eventual disposition. Its purpose is to protect material from loss, alteration, contaminationContamination - The unwanted transfer of material from another source to a piece of physical evidence. The inadvertent touching of a weapon, thereby adding fingerprints to it is an example of evidence contamination. Read Full Definition and degradation, while retaining a defensible record of what was recovered and how it was handled. The correct approach depends on the condition of the item, the material present and the examinations anticipated. A damp bloodstained shirt, a dry fiber, a glass fragment and fire debris cannot be managed under one universal packaging rule.
- What is the difference between evidence collection and preservation?
- Which current forensic standards and guidance apply?
- Crime scene evidence preservation: a practical workflow
- 1. Protect people and control the scene
- 2. Document the item before changing its condition
- 3. Decide what examinations may be needed
- 4. Recover using suitable clean equipment
- 5. Package, seal and label
- 6. Transfer promptly to controlled storage or a laboratory
- Evidence packaging selection table: which container should be used?
- Wet biological evidence: the most important packaging exception
- Packaging trace evidence without losing small particles
- Exceptions for fire debris, documents and other sensitive evidence
- Fire debris and suspected ignitable-liquid residues
- Questioned documents
- Sharp objects, firearms and fragile exhibits
- Evidence labels, seals and chain-of-custody records
- Preventing cross-contamination during drying, packing and storage
- Three hypothetical evidence-packaging decisions
- Example 1: Rain-soaked shirt with visible reddish staining
- Example 2: Charred carpet possibly containing ignitable-liquid residue
- Example 3: Glass fragments adhering to a jacket
- Final crime scene evidence packaging checklist
- Frequently asked questions
- Related Simply Forensic guides
- References and authoritative guidance
This guide explains how investigators choose suitable packaging, prevent avoidable damage, document decisions and recognize exceptions. It is intended for forensic students, crime scene investigators, police officers and evidence custodians. Specific procedures must follow the receiving laboratory’s requirements, an agency’s validated procedures and applicable laws.
What is the difference between evidence collection and preservation?
Collection is the physical recovery of material or an item from a scene. Preservation is the set of measures used to maintain its evidential characteristics, including its condition, location history and suitability for later examination. Packaging provides a protective barrier during handling, storage and transfer, but the wrong container can itself damage the evidence.
A photograph records an item’s condition and location but does not replace collecting the item when collection is feasible and authorized. Similarly, sealing an item does not establish that the material was uncontaminated before it entered the package. The NIJ crime scene guide emphasizes recording, prioritizing, recovering, packaging and submitting evidence as connected activities.[1]
Which current forensic standards and guidance apply?
Published standards, proposed standards and advisory manuals must not be described as if they all have identical legal force. The 2013 NIJ crime scene guide and NISTIR 7928 biological evidence handbook provide established practical recommendations.[1][2] The OSAC 2021-N-0018 physical-evidence collection document remains an OSAC proposed standard in SDO development, not a finalized ANSI standard.[3]
For more specialized subjects, ANSI/ASTM E3457-25 addresses trace-evidence detection and preservation, while ANSI/ASB Standard 207-26 concerns documentary evidence. Both are published standards listed by NIST.[6][7] ANSI/ASB Standard 195-25 addresses initial response by scene investigators.[10]
In England and Wales, the Forensic Science Discover the fascinating field of Forensic Science, the application of scientific principles to legal matters. This post delves into its many disciplines, from DNA analysis to crime scene investigation, its importance in the justice system, Read Full Definition Regulator’s statutory Code of Practice, version 2 came into force in October 2025 and includes specific requirements for relevant forensic activities. Its territorial and activity scope must be respected; it is not a global rule.[4] Outside that jurisdiction, practitioners must identify the locally applicable legal, accreditationAccreditation – a process by which a laboratory must prove to an accrediting agency that their processes, equipment, and employees are competent, credible, and accurate. The accrediting agency will inspect the laboratory and observe its Read Full Definition and laboratory requirements.
Crime scene evidence preservation: a practical workflow
1. Protect people and control the scene
Emergency medical assistance, personal safety and hazard assessment take priority. Once safe and lawful, restrict unnecessary access, identify a route for movement, establish clean working areas for unused supplies and record significant entries and actions. Protect transient or vulnerable traces from weather, foot traffic, moving vehicles and other foreseeable threats. Hazardous chemicals, unstable devices, dangerous weapons or structural risks require trained specialist response rather than improvised collection.[1][5][10]
2. Document the item before changing its condition
Record where the item was found, its orientation, apparent condition, visible staining, environmental exposure, relevant nearby objects and any action already taken by responders. Capture overview, midrange and close-up images when appropriate; include an appropriate scale without obscuring or contacting sensitive material. Record who recovered the item, when, where and by which method. Notes should distinguish observations from assumptions.
3. Decide what examinations may be needed
Many objects carry more than one evidence type. A bottle may contain possible touch DNADNA recovered from a surface or object after contact, which can originate from skin-associated cells or other transferred biological material., fingermarks and microscopic trace particles. Discuss examination order with the receiving laboratory if processes could alter one another. For example, fingerprint treatment can influence later DNA DNA, or Deoxyribonucleic Acid, is the genetic material found in cells, composed of a double helix structure. It serves as the genetic blueprint for all living organisms. Read Full Definition sampling, while uncontrolled handling can shed fibers or dislodge particles. No sequence is suitable for every exhibit; document the choice and any necessary compromises.[5]
4. Recover using suitable clean equipment
Use collection tools and packaging appropriate to the examination, the substrate and the anticipated trace quantities. Replace disposable tools between independent samples or clean and verify reusable equipment according to procedure. Change gloves when moving between potentially contaminating items or when gloves are compromised. Avoid unnecessary contact, blowing on stains, touching the inner surface of containers or moving suspect and victim belongings together.[5]
5. Package, seal and label
Choose a container that prevents transfer, escape, breakage and chemical or biological change. Where cross-contaminationCross-contamination - The unwanted transfer of material between two or more sources of physical evidence. For example, improperly collecting biological evidence such as blood could lead to one sample mixing with another sample and contaminating Read Full Definition or provenance matters, use separate primary packages and suitable outer protection. Restrain sharp, heavy and fragile items in rigid packaging; do not permit an item to pierce its container. Apply an identifiable tamper-evident seal and record the sealer’s identity according to the agency’s procedure. Mark the packaging rather than the evidence itself when marking could alter a questioned surface.[2][3]
6. Transfer promptly to controlled storage or a laboratory
Do not assume that every item tolerates room temperature, refrigeration or freezing. Determine whether drying, refrigeration, freezing, an airtight container or specialist hazardous-material arrangements are needed. Minimize time in hot vehicles and direct sunlight; document exceptional delays, interim locations and deviations. Transfer records must identify custody, not simply state that an item was ‘sent to the lab’.[2][11][12]
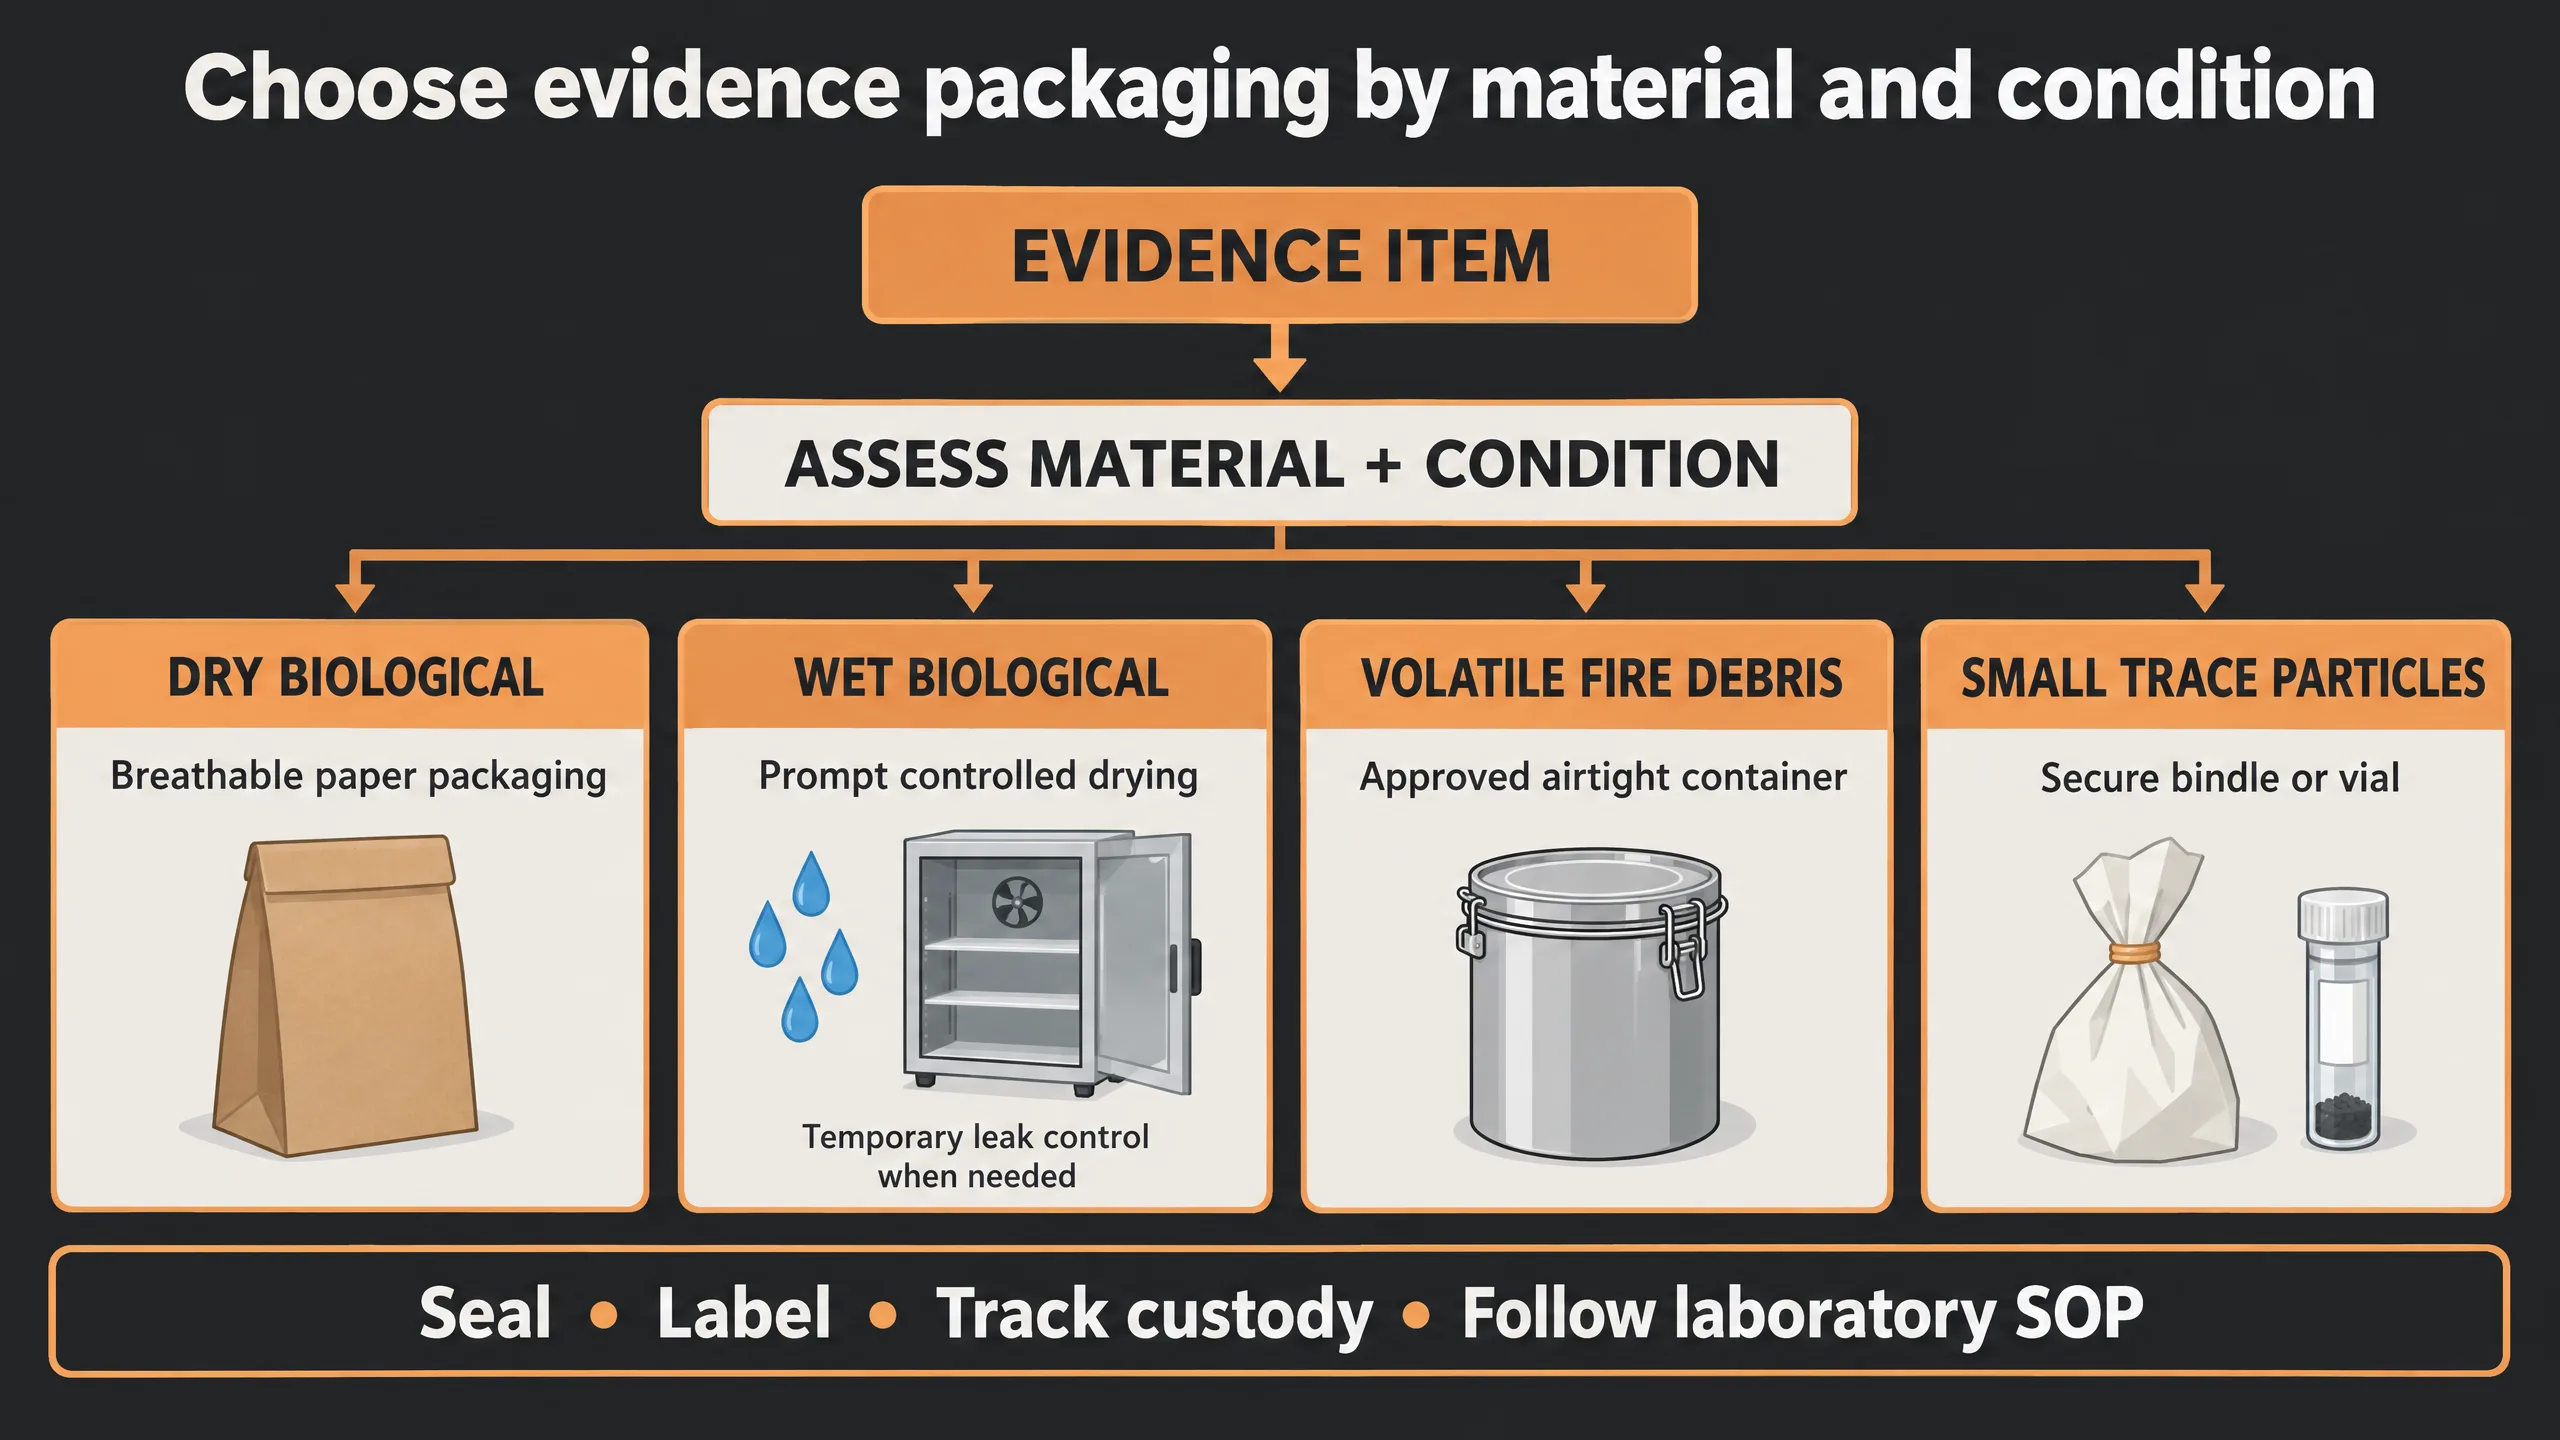
Evidence packaging selection table: which container should be used?
The following matrix gives general starting points, not an override of local laboratory submission instructions. Collection method, chemical composition, moisture, risk to other examinations and transport duration may change the decision.
| Evidence type and condition | Preferred initial approach | Critical caution |
|---|---|---|
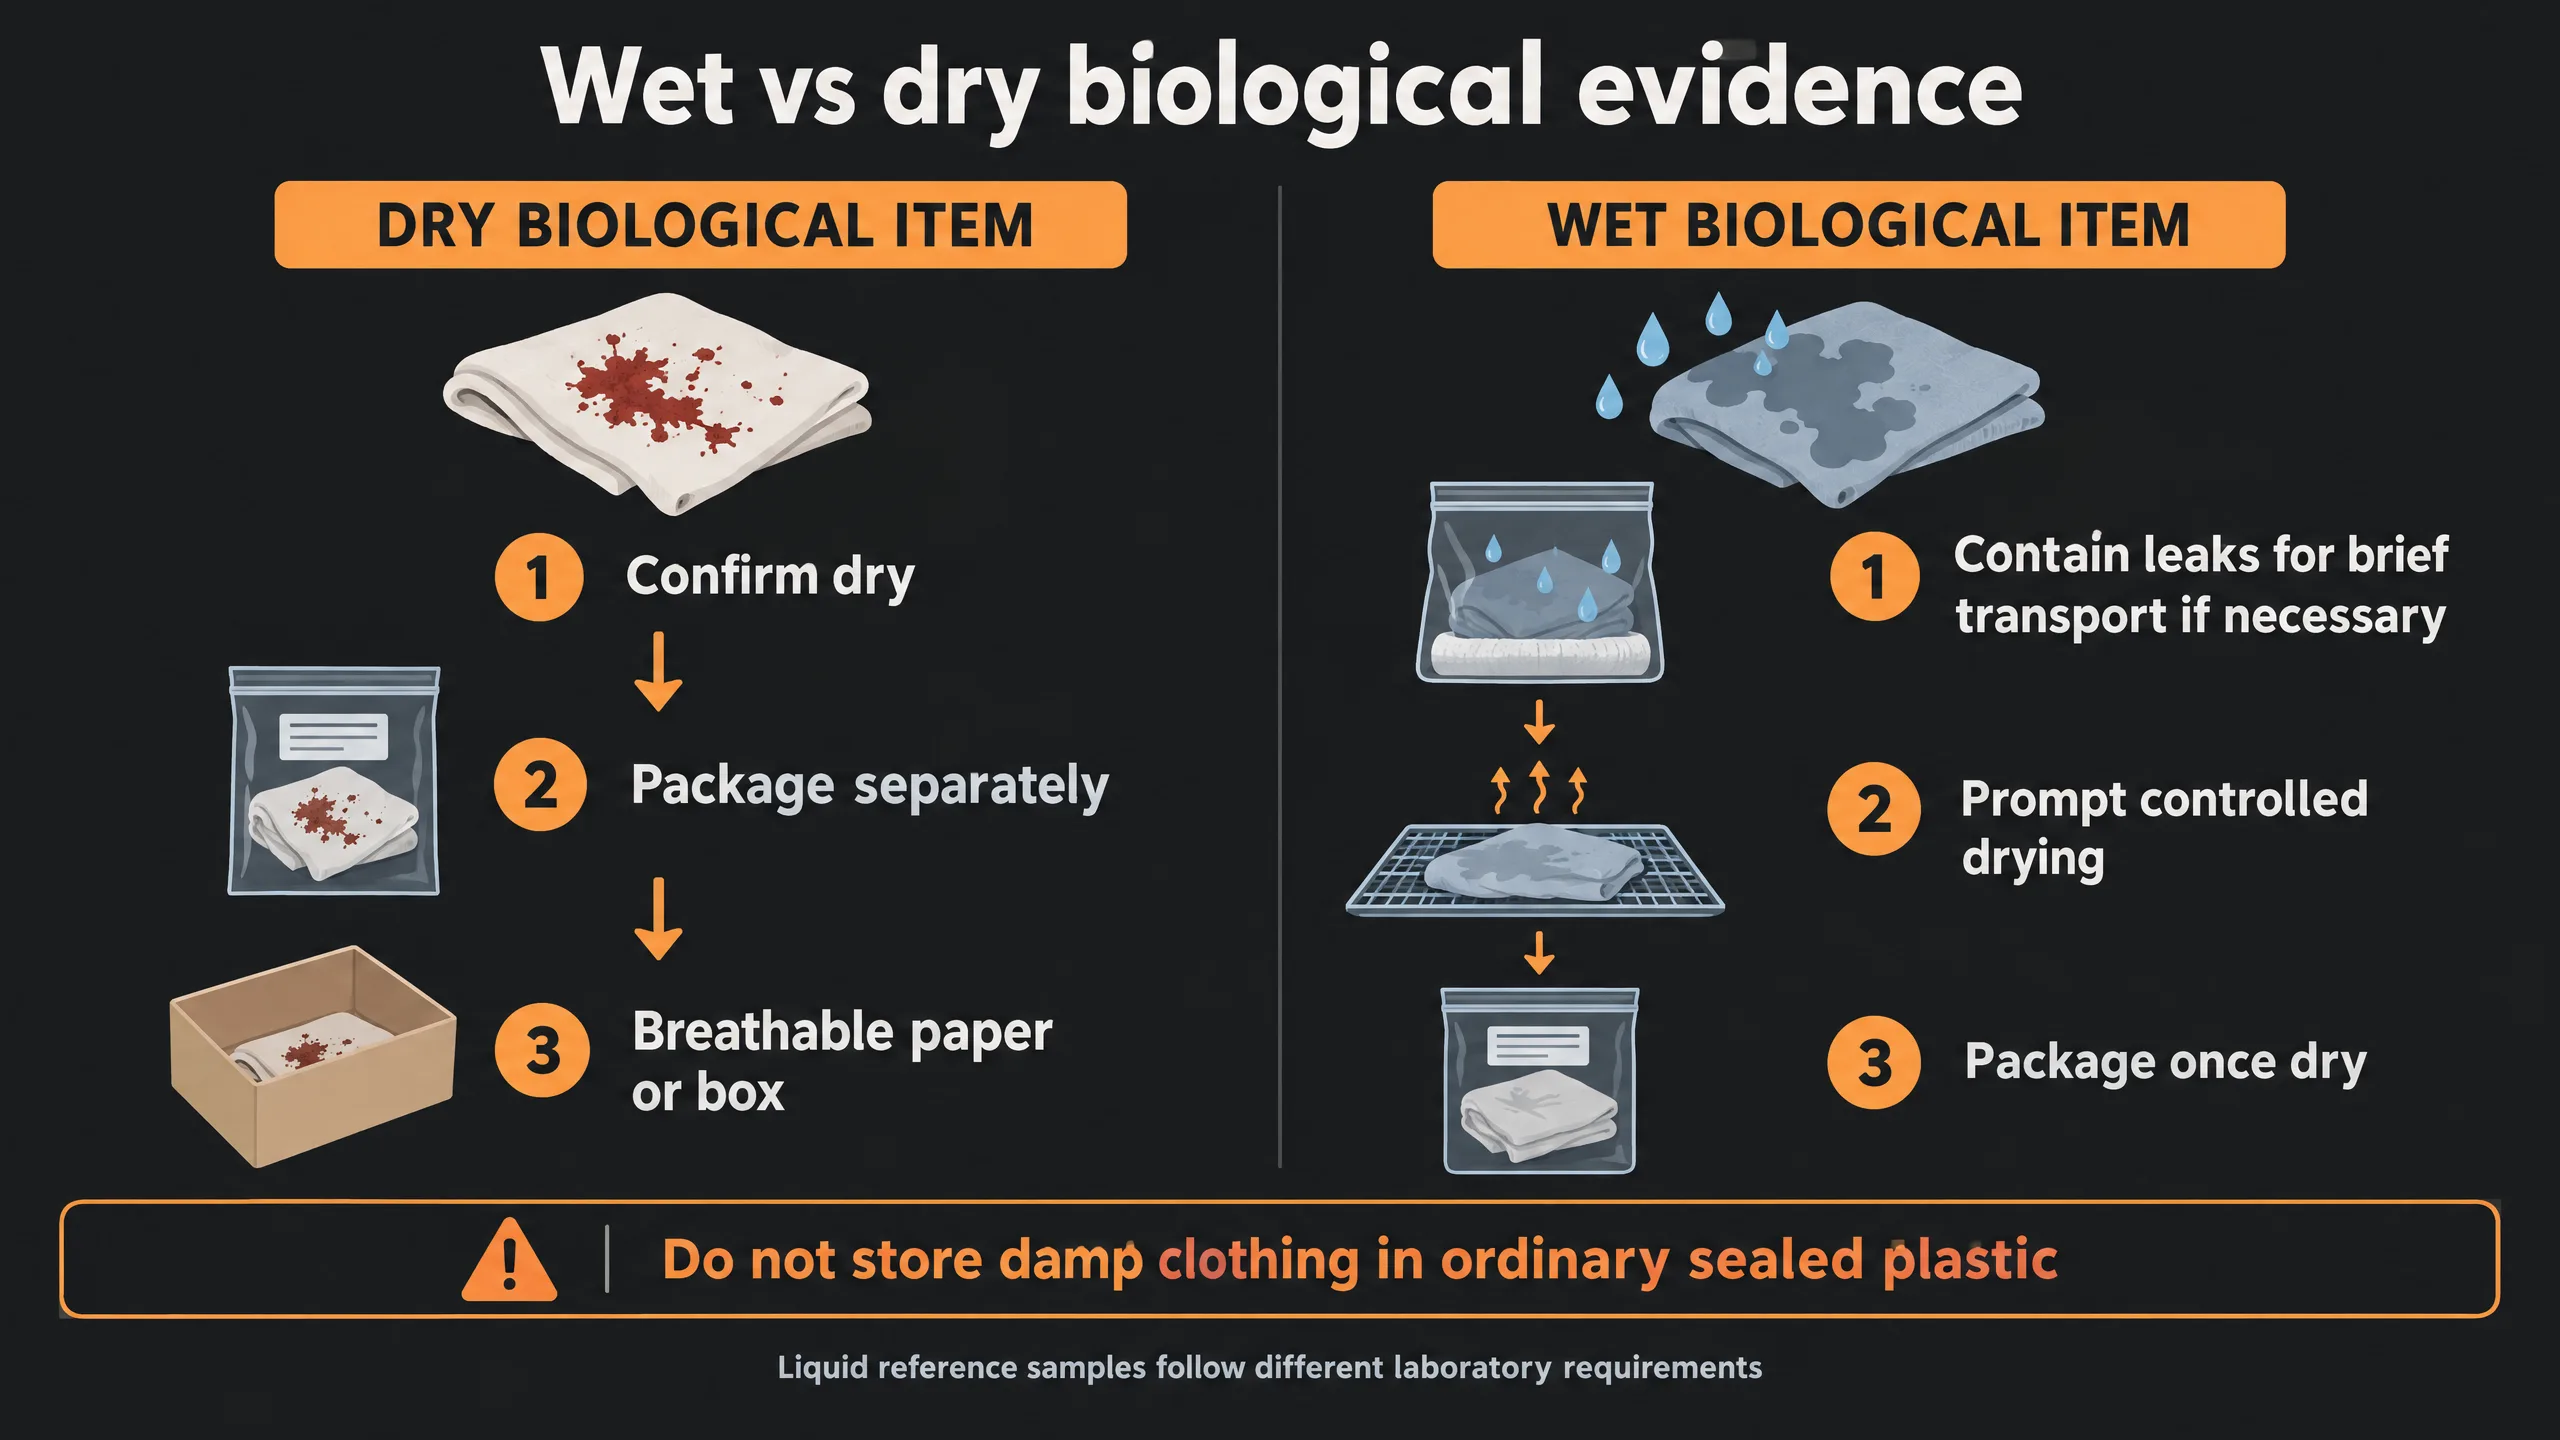
| Dry bloodstained clothing or dried biological stain on an object | Keep dry; individually package in clean paper, a breathable bag or protective box | Avoid trapping moisture; protect the stain from rubbing against another surface |
| Damp or soaked biological exhibit | Move promptly to an approved secure drying facility; use temporary leak-resistant containment when leakage presents a transport risk | Temporary impermeable packaging is not a long-term storage solution; document and expedite drying or laboratory treatment |
| Dry forensic swab | Air-dry as required and use a clean individual swab box, breathable container or approved tube system | Do not combine swabs from different sites without an explicit collection plan |
| Liquid blood, biological fluid or tissue | Approved sterile leak-proof tube or rigid container with appropriate secondary containment | Temperature, preservatives, biosafety and transport time depend on specimen and destination laboratory |
| Hair, fibers, paint chips, small glass fragments | Secure small particles in a clean paper bindle, appropriate small container or rigid vial inside labelled secondary packaging | Loose particles can escape through envelope seams or be lost to static or handling |
| Fragile fracture or impression evidenceImpression evidence - Objects or materials that have retained the characteristics of other objects that have been physically pressed against them Read Full Definition | Rigid protective container; immobilize without contact with critical surfaces | Avoid abrasion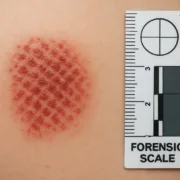 An abrasion is a superficial skin wound, or scrape, caused by friction. In forensic pathology, its pattern and characteristics can reveal crucial information about the cause, timing, and circumstances of an injury... Read Full Definition, compression and movement; consult a specialist for casting or lifting |
| Document possibly bearing handwriting, prints or DNA | Protect flat in an appropriate clean sleeve, envelope or rigid folder as examination needs dictate | Do not write on, fold or unnecessarily handle questioned surfaces |
| Fire debris for volatile ignitable-liquid analysis | Approved airtight container accepted by the receiving laboratory, such as a clean unused lined metal can, suitable airtight glass jar or approved heat-sealed nylon bag | Do not air-dry or use ordinary paper bags for suspected volatile residues |
Wet biological evidence: the most important packaging exception
Moisture can encourage bacterial or fungal activity, cause stains to move within packaging and compromise later testing. For bloodstained clothing, bedding and many other damp items, controlled drying is usually preferable before routine storage. The drying space must be clean, secure and managed to prevent transfer between exhibits. Place clean collection paper beneath an item when relevant to capture falling trace particles, and retain the paper as a separate, documented exhibit when appropriate.[2][5]
Do not confuse temporary transport containment with storage. A dripping item may need an approved nonporous, leak-resistant outer container for a short transfer so it cannot contaminate personnel or other evidence. It should then be promptly removed and dried or otherwise preserved under an authorized procedure; keeping wet clothing sealed in a plastic bag for days is poor practice. The NIST/NIJ handbook discusses carefully managed short-term refrigerated containment when immediate drying is impossible.[2][11]
Conversely, some biological materials must remain liquid or frozen. A liquid reference specimen, tissue or other special sample may require a closed sterile tube, refrigeration, freezing or a specified stabilizer. These are not contradictions: they are different specimen classes requiring different preservation mechanisms. Do not assume a universal temperature for all biological evidence.[2][3]
Packaging trace evidence without losing small particles
Individual fibers, hairs, glass fragments and paint chips can be lost through small gaps, transferred through handling or mixed with material from another source. Small trace material may be secured inside a folded paper bindle (druggist fold), appropriate clean vial or other laboratory-approved primary container, then placed inside a labelled outer package. The entire item may be preferred to an attempted recovery if removing the trace risks altering its distribution or compromising additional examinations.
Package questioned and known comparison samples separately, and distinguish items collected from suspects, complainants, scenes and reference locations. Record both the precise"Precise" refers to the degree of closeness or consistency between multiple measurements or values taken under the same conditions. It indicates how well these measurements agree with each other, regardless of whether they are accurate Read Full Definition recovery position and the substrate from which the material was removed. The recently registered ANSI/ASTM E3457-25 is a useful published technical guide for trace-evidence detection and preservation.[6]
Exceptions for fire debris, documents and other sensitive evidence
Fire debris and suspected ignitable-liquid residues
Volatile compounds can escape from a porous bag and change before analysis. Evidence specifically collected for ignitable-liquid analysis generally requires properly sealed, airtight and chemically compatible containers, and should not be air-dried. Depending on laboratory requirements, options include clean unused lined metal cans, suitable glass jars with vapor-tight lids and approved heat-sealed nylon bags. Some laboratories reject unlined cans; ordinary polyethylene bags are not vapor-tight. Consult the fire-debris laboratory about sampling, headspace, packaging capacityThe amount of finished product that could be produced, either in one batch or over a defined period of time, and given a set list of variables. Read Full Definition, shipping and storage. Where the same object may also carry DNA or fingermarks, coordinate examination priorities before treatment.[9][13]
Questioned documents
Handle a document by areas least likely to affect handwriting, impressions, indented writing, fingerprintsFingerprint, impression made by the papillary ridges on the ends of the fingers and thumbs. Fingerprints afford an infallible means of personal identification, because the ridge arrangement on every finger of every human being is Read Full Definition or DNA. Avoid folding, marking, stapling or writing on top of it. Protective packaging should minimize movement and environmental exposure without obscuring chain-of-custody identification. ANSI/ASB Standard 207-26 is a published document-preservation standard; it should be distinguished from superseded OSAC proposal versions.[7]
Sharp objects, firearms and fragile exhibits
Document the object’s original state and position, identify hazards and seek qualified personnel for safe handling of weapons or hazardous devices. Immobilize the item within suitable rigid outer packaging, protecting trace-bearing surfaces and avoiding contact between cutting edges and the packaging. A biohazard warning is appropriate when relevant, but does not replace a secure container or safety procedure.
Evidence labels, seals and chain-of-custody records
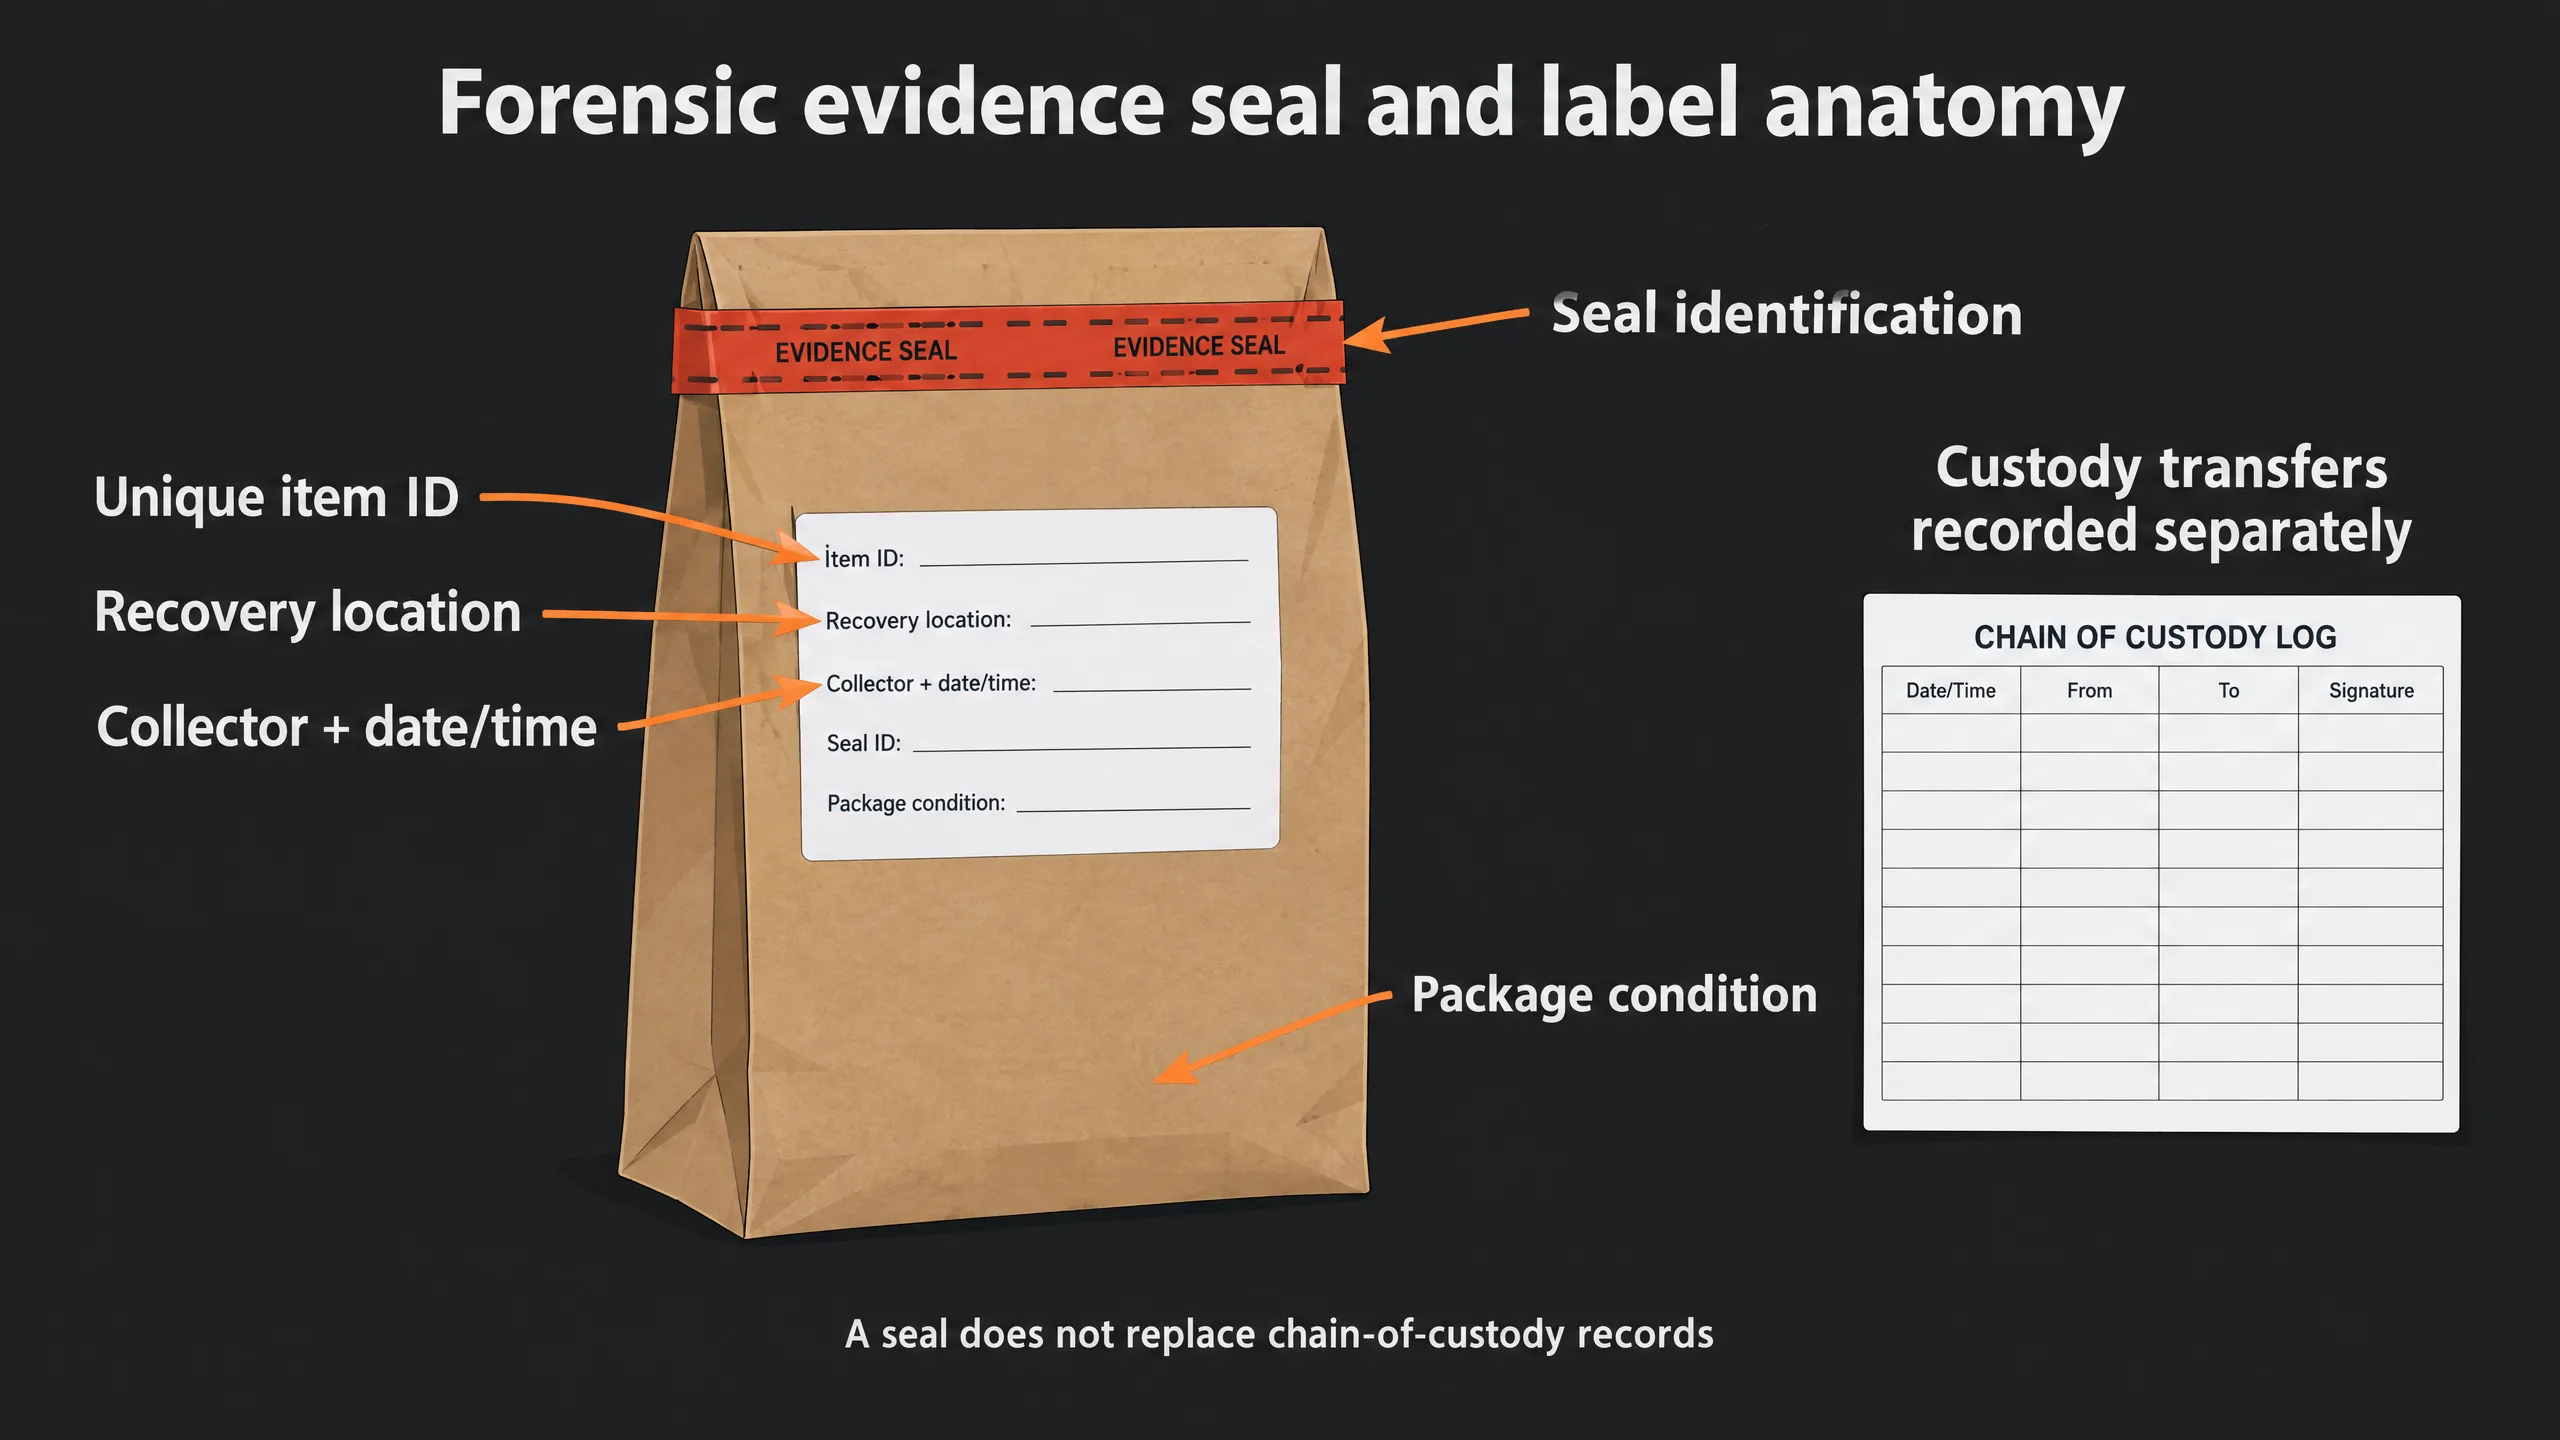
A practical package label identifies the agency and case, unique item or exhibit number, description, recovery location, date and time, collector, relevant hazard and any required preservation notice. The seal should make unauthorized opening detectable; the record should explain legitimate openings, re-sealing and transfers. Labels alone do not establish continuity.
| Record field | Why it matters |
|---|---|
| Unique exhibit/item identifier | Prevents confusion between items and later subsamples |
| Exact location and collection description | Links physical material to the documented scene |
| Collector, date and time | Establishes who obtained it and when |
| Condition, hazard and packaging method | Explains handling decisions and special precautions |
| Custody transfers and storage locations | Documents the people or units responsible at each stage |
| Opening, sampling, repackaging and resealing history | Preserves the traceability of changes after collection |
Chain of custodyChain of custody - The process used to maintain and document the chronological history of the evidence. Documents record the individual who collects the evidence and each person or agency that subsequently takes custody of Read Full Definition is a documented history of handling and control. A missing signature, unrecorded interval or damaged seal requires investigation and disclosure where appropriate; it does not automatically establish tampering or make evidence inadmissible in every court. Legal consequences depend on the facts and relevant law. For an extended explanation, see our chain-of-custody guide.[2]
Preventing cross-contamination during drying, packing and storage
Cross-contamination may occur between exhibits, between a practitioner and an item, or through consumables and reusable equipment. Control risks by arranging a clean packaging area, minimizing handling, separating potentially linked suspect and complainant items, changing gloves as needed and using validated cleaning procedures. Drying cabinets and spaces should have cleaning and access records; different exhibits should not simply be hung together because they belong to the same case.[4][5]
Contamination controls also extend to packaging supplies. Store unused consumables securely, avoid touching collection surfaces, and use purpose-appropriate DNA-sensitive materials when required. Record significant deviations and make the receiving laboratory aware of incidents that could affect evaluation. Good practice is risk reduction, not a claim that contamination has become impossible.
Three hypothetical evidence-packaging decisions
Example 1: Rain-soaked shirt with visible reddish staining
Scene: A wet shirt is recovered outdoors after rainfall. Risk: prolonged moisture, stain migration, possible cross-transfer and microbial degradation. Decision: photograph its location and condition; recover with suitable clean tools; isolate it from other items. Arrange prompt controlled drying. If short-term leak-resistant containment is essential, identify it as temporary and record the transfer and drying arrangements. What not to do: leave it sealed in ordinary plastic for several days or dry it alongside an unrelated suspect’s clothing.
Example 2: Charred carpet possibly containing ignitable-liquid residue
Scene: Burned carpet is collected near a suspected fire origin. Risk: loss of volatile residues through evaporation. Decision: consult the fire-debris laboratory, use an approved airtight container and maintain separate sample identification. What not to do: apply the routine biological-evidence instruction to air-dry the carpet or package it in a paper bag. This may be precisely the wrong preservation choice.
Example 3: Glass fragments adhering to a jacket
Scene: Several small fragments are visible on outer clothing. Risk: dislodgement, commingling and loss of positional information. Decision: document their location before movement; consult the receiving laboratory on whether to submit the intact garment or recover particles individually. Use secure primary packaging for loose fragments and maintain separation from comparison glass. What not to do: shake the jacket over a common tray or pour unrelated fragments into one unlabelled envelope.
These scenarios illustrate evidence-preservation reasoning, not a substitute for agency SOPs or specialist consultation.
Final crime scene evidence packaging checklist
- Are scene safety, authority and access controls addressed?
- Has the item’s original location, condition and relevant context been documented?
- Have other potential examinations been considered before destructive or contaminating steps?
- Are tools, gloves and collection supplies suitable and controlled?
- Is the primary package appropriate to the item, moisture, chemical hazards and intended analysis?
- Are independent exhibits separated and fragile traces restrained against loss?
- Is the package sealed, labelled and matched to a unique evidence record?
- Are temporary transport and long-term storage requirements distinguished?
- Are transfers, drying, repackaging, openings and exceptions documented?
- Has the receiving laboratory been advised of unusual risks, wet items or nonstandard handling?
Frequently asked questions
Should all forensic evidence be packaged in paper bags?
No. Paper or other breathable packaging is often appropriate for dried biological material, but liquid specimens require closed leak-proof containers, volatile fire debris needs airtight packaging, and fragile traces may need rigid protective containers.
Can a wet bloodstained garment be sealed in plastic?
Only when justified as short-term, controlled leak-resistant containment for transport or another approved exception. Prolonged storage of wet biological items in ordinary plastic risks microbial growth, stain movement and degradation. Arrange prompt controlled drying or laboratory preservation.
Do biological swabs always need refrigeration?
No universal storage rule applies to every swab or sample. Dry swabs, liquid blood and preserved reference samples can have different approved storage requirements. Follow collection-device instructions and the receiving laboratory’s specimen-specific SOP.
What is the difference between an evidence seal and chain of custody?
A seal helps reveal package opening or interference. Chain of custody is the documented record of who controlled or transferred the exhibit, when, where and why. Both are important, but neither proves that no contamination occurred.
Why must fire debris be packed differently from wet biological evidence?
When the target is a volatile ignitable-liquid residue, air-drying and porous packaging can allow the compounds of interest to evaporate. Approved airtight chemically compatible packaging is typically required.
Should DNA, fingerprints or trace particles be collected first?
There is no universal sequence. The investigator should evaluate which examination may alter another and, where needed, consult the laboratory to establish a documented processing order.
Does a chain-of-custody gap automatically make evidence inadmissible?
No. Its significance depends on the type of gap, the ability to explain or corroborate handling, the jurisdiction’s rules and the facts of the case. It must not be concealed or dismissed without assessment.
Related Simply Forensic guides
- Crime Scene Investigation: A Comprehensive Guide
- 12 Critical Steps of Crime Scene Processing
- Crime Scene Documentation: Photography, Notes and Sketches
- How It’s Done: DNA Evidence Collection
- Forensic Glass Analysis
- Fire Debris Analysis and Ignitable-Liquid Residues
References and authoritative guidance
Source and standards review: 14 November 2026. Published standards, proposed drafts, statutory codes and educational guidelines are identified separately; their applicability must be checked locally.
- NIJ, Crime Scene Investigation: A Guide for Law Enforcement (2013).
- NIST/NIJ, The Biological Evidence Preservation Handbook, NISTIR 7928 (2013).
- OSAC 2021-N-0018, Standard for On-Scene Collection and Preservation of Physical Evidence (proposed standard; in SDO development).
- UK Forensic Science Regulator, Statutory Code of Practice, Version 2 (2025; England and Wales).
- UK Forensic Science Regulator, Contamination Controls: Scene of Crime, FSR-GUI-0016 (2023).
- ANSI/ASTM E3457-25, Standard Guide for Detection and Preservation of Forensic Trace Evidence (published; OSAC Registry added June 2026).
- ANSI/ASB Standard 207-26, Standard for Collection and Preservation of Document Evidence (published 2026).
- NIJ, Biological Evidence Packaging, archived educational guidance.
- NIST OSAC, Trace Materials Crime Scene Investigation Guide (draft 2020; specialist guidance).
- ANSI/ASB Standard 195-25, Standard for Scene Response: Initial Response by Scene Investigators (published 2025).
- NIJ, Packaging for Transportation, archived educational guidance.
- NIST, Biological Evidence Guidance and Storage Resources.
- Georgia Bureau of Investigation, Division of Forensic Sciences, Fire Debris: Evidence Packaging and Submission Guidance.
Educational notice: This article explains general forensic practice and cannot supersede laboratory submission requirements, agency SOPs, biosafety guidance or jurisdiction-specific retention law.